February 26th, 2021
Posted by Paul

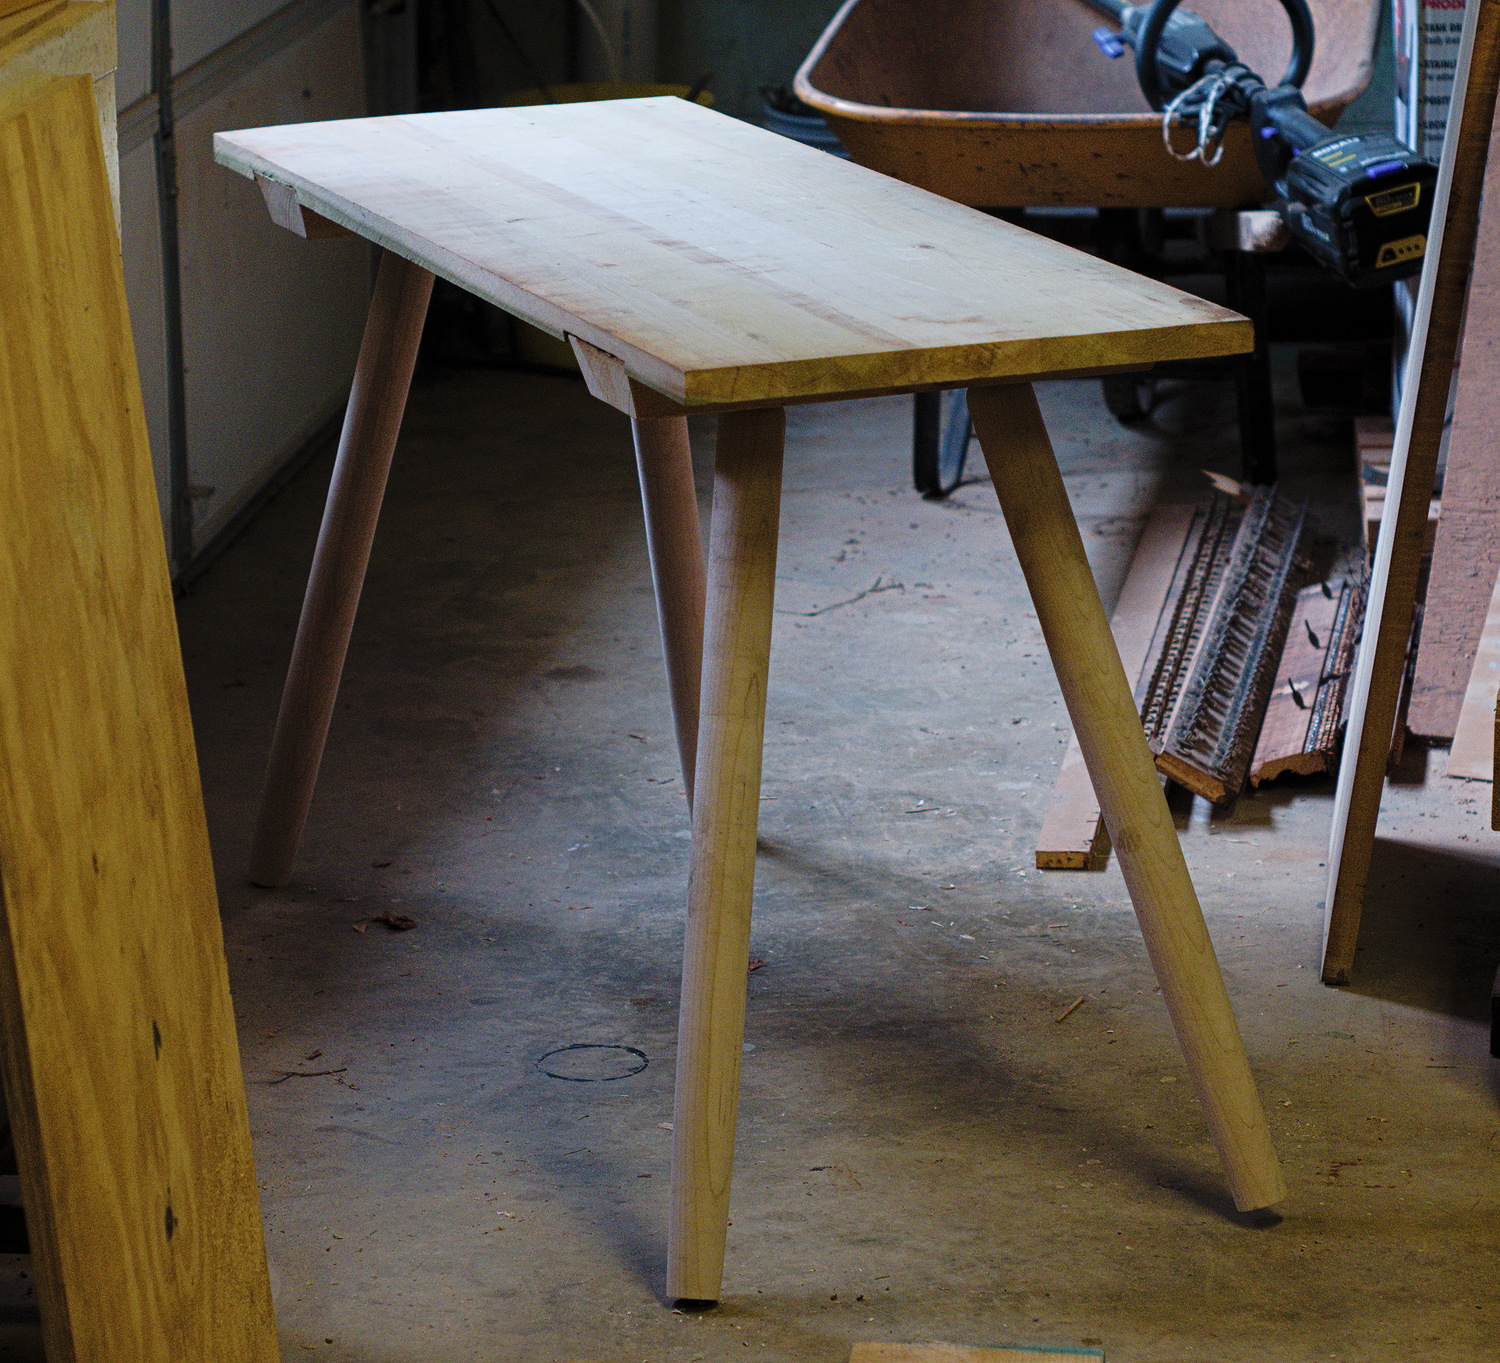
Here is the table set up and in use. It replaces a small desk and kitchen table that used to be in this corner. Since there are no drawers, I am in the process of drawing up a hanging cabinet to go above.
February 26th, 2021
Posted by Paul

Chris Schwarz, in his Anarchist's Design Book, postulates that during medieval and rennaissance days people carried their boards and trestles out into the meadows for parties. Certainly it is a common theme in artwork of the time. In the early years of European settlement in New England, the colonists kept to the old customs, building trestle tables that could be taken down and put to the side when space was needed for something else, or easily loaded onto a wagon when moving time came. As people became more rooted, they built bigger and heavier furniture, until by the Victorian era, many articles became so massive that a team of professional movers was needed to shift them as much as across the room.
Nowadays few people live in their ancestral homes. They can expect to move numerous times over a lifetime. Most modern furniture is lighter and can be disassembled with relative ease. I can't say that I dislike the Scandinavian Modern design ethic, but I prefer early Colonial. For a new computer desk, I drew a board and trestle modeled on one in Wallace Nutting's Furniture of the Pilgrim Century. Gravity holds the top in place and there are no mechanical fasteners. To quote Nutting, "the ingenious stiffening brace is located at a point in which it is wholly out of the way, and effective, being let down into a slot in the trestles". The top and two trestles are easily managed by one person, and there is no need to jack the legs through narrow doorways. It is a good example of the kind of functional, attractive and portable furniture that we like to build.
February 20th, 2021
Posted by Paul

Back in June 2015 we built this cabinet to hold Levi and Marie's game controllers, routers and other computer gear. To make it Lars-proof we installed a spring-loaded elbow catch accessed through a hole in the door front. Lars spent many hours trying to figure it out but it served its purpose for a couple of years. By the time he finally learned to open it, he was better able to understand consequences, and after a couple of examinations of the cabinet content, he left it alone. It didn't take Lex as long to learn the trick, so Levi jammed a lego between the lower edge and the floor to keep him out. To console himself, Lex feeds cheetohs in through the hole. He finds that very entertaining.
February 16th, 2021
Posted by Paul

The cherry cupboard we delivered to Levi last August is serving well. Next to it is a corkboard, a project from May 2017.
February 12th, 2021
Posted by Joe

I put a second coat on the table and legs, we missed a lot of places on the legs. I coated the table bottom and then turned it over and did the legs separately so I could see what I was doing.
February 11th, 2021
Posted by Paul

A first coat of poly on the top of the trestle table brings out the grain and colors.
February 8th, 2021
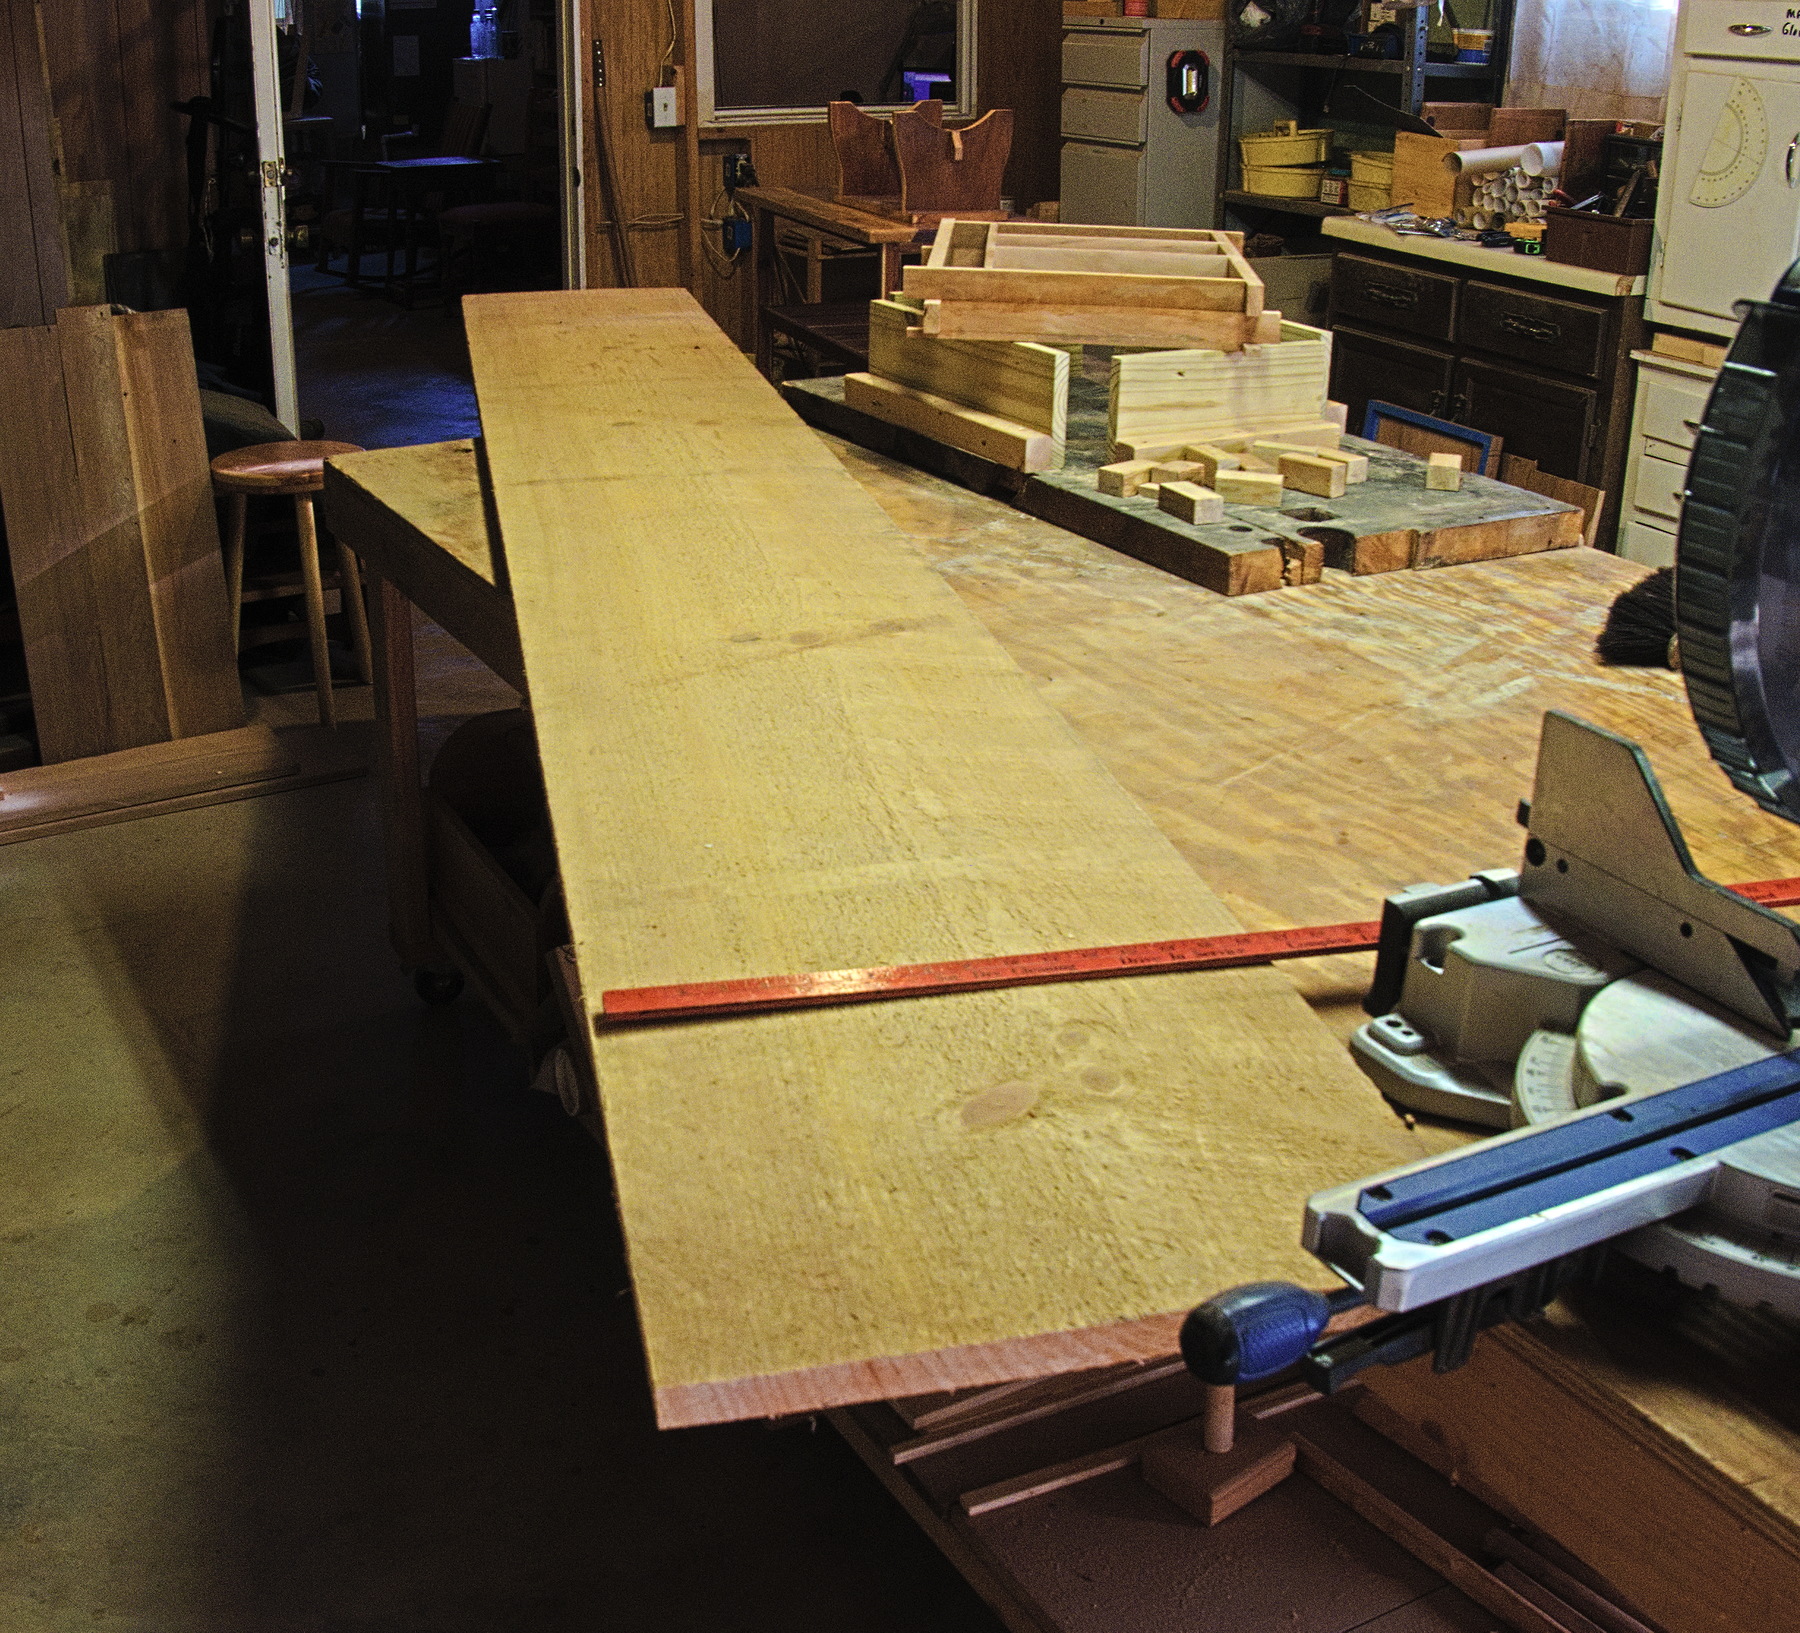
Posted by Paul

The trestle table is almost complete. It needs 7/8" pads at the four corners to lift it off the ground, lots of sanding and a few coats of polyurethane.
February 4th, 2021
Posted by Paul

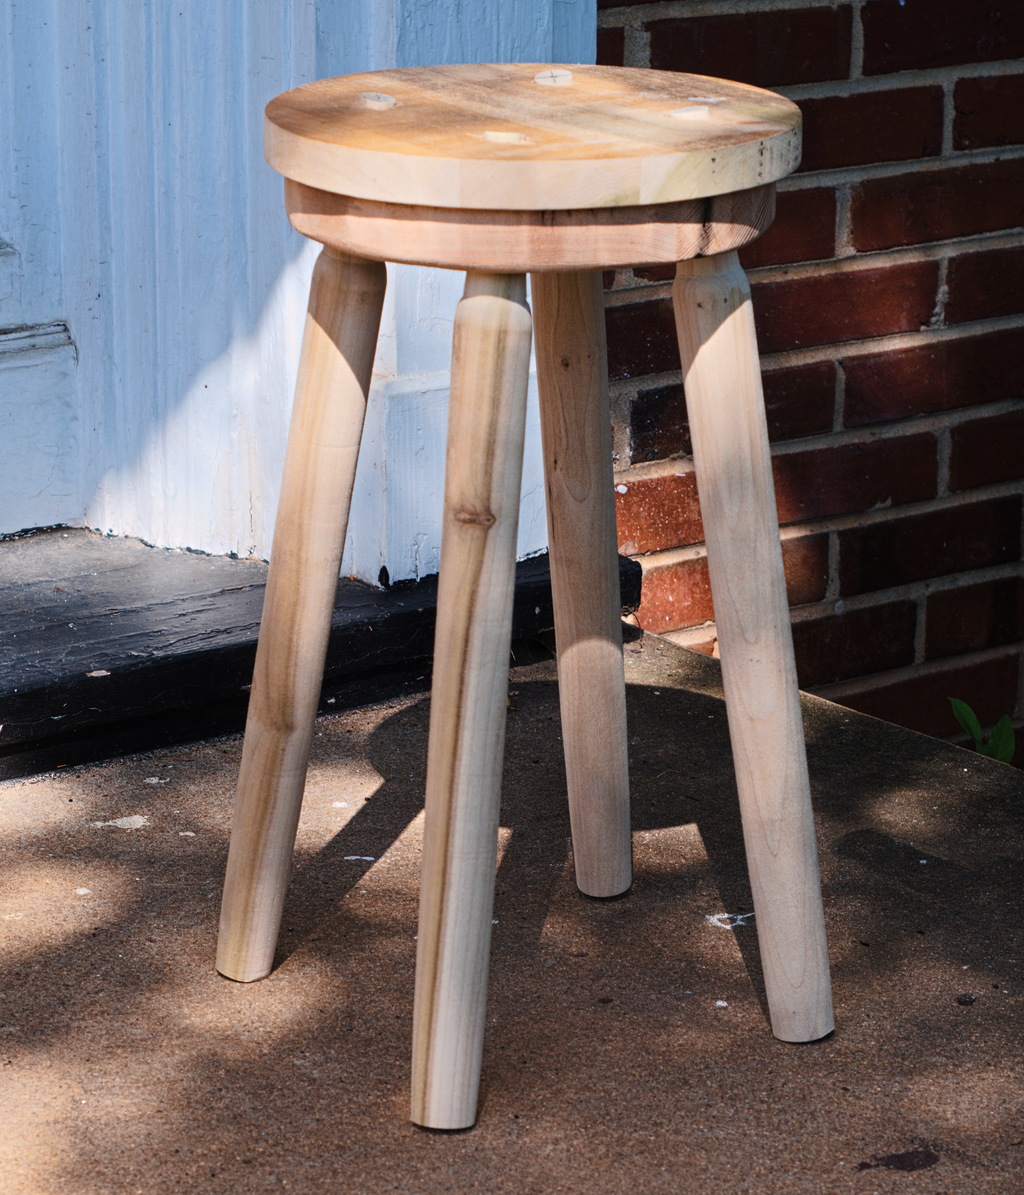
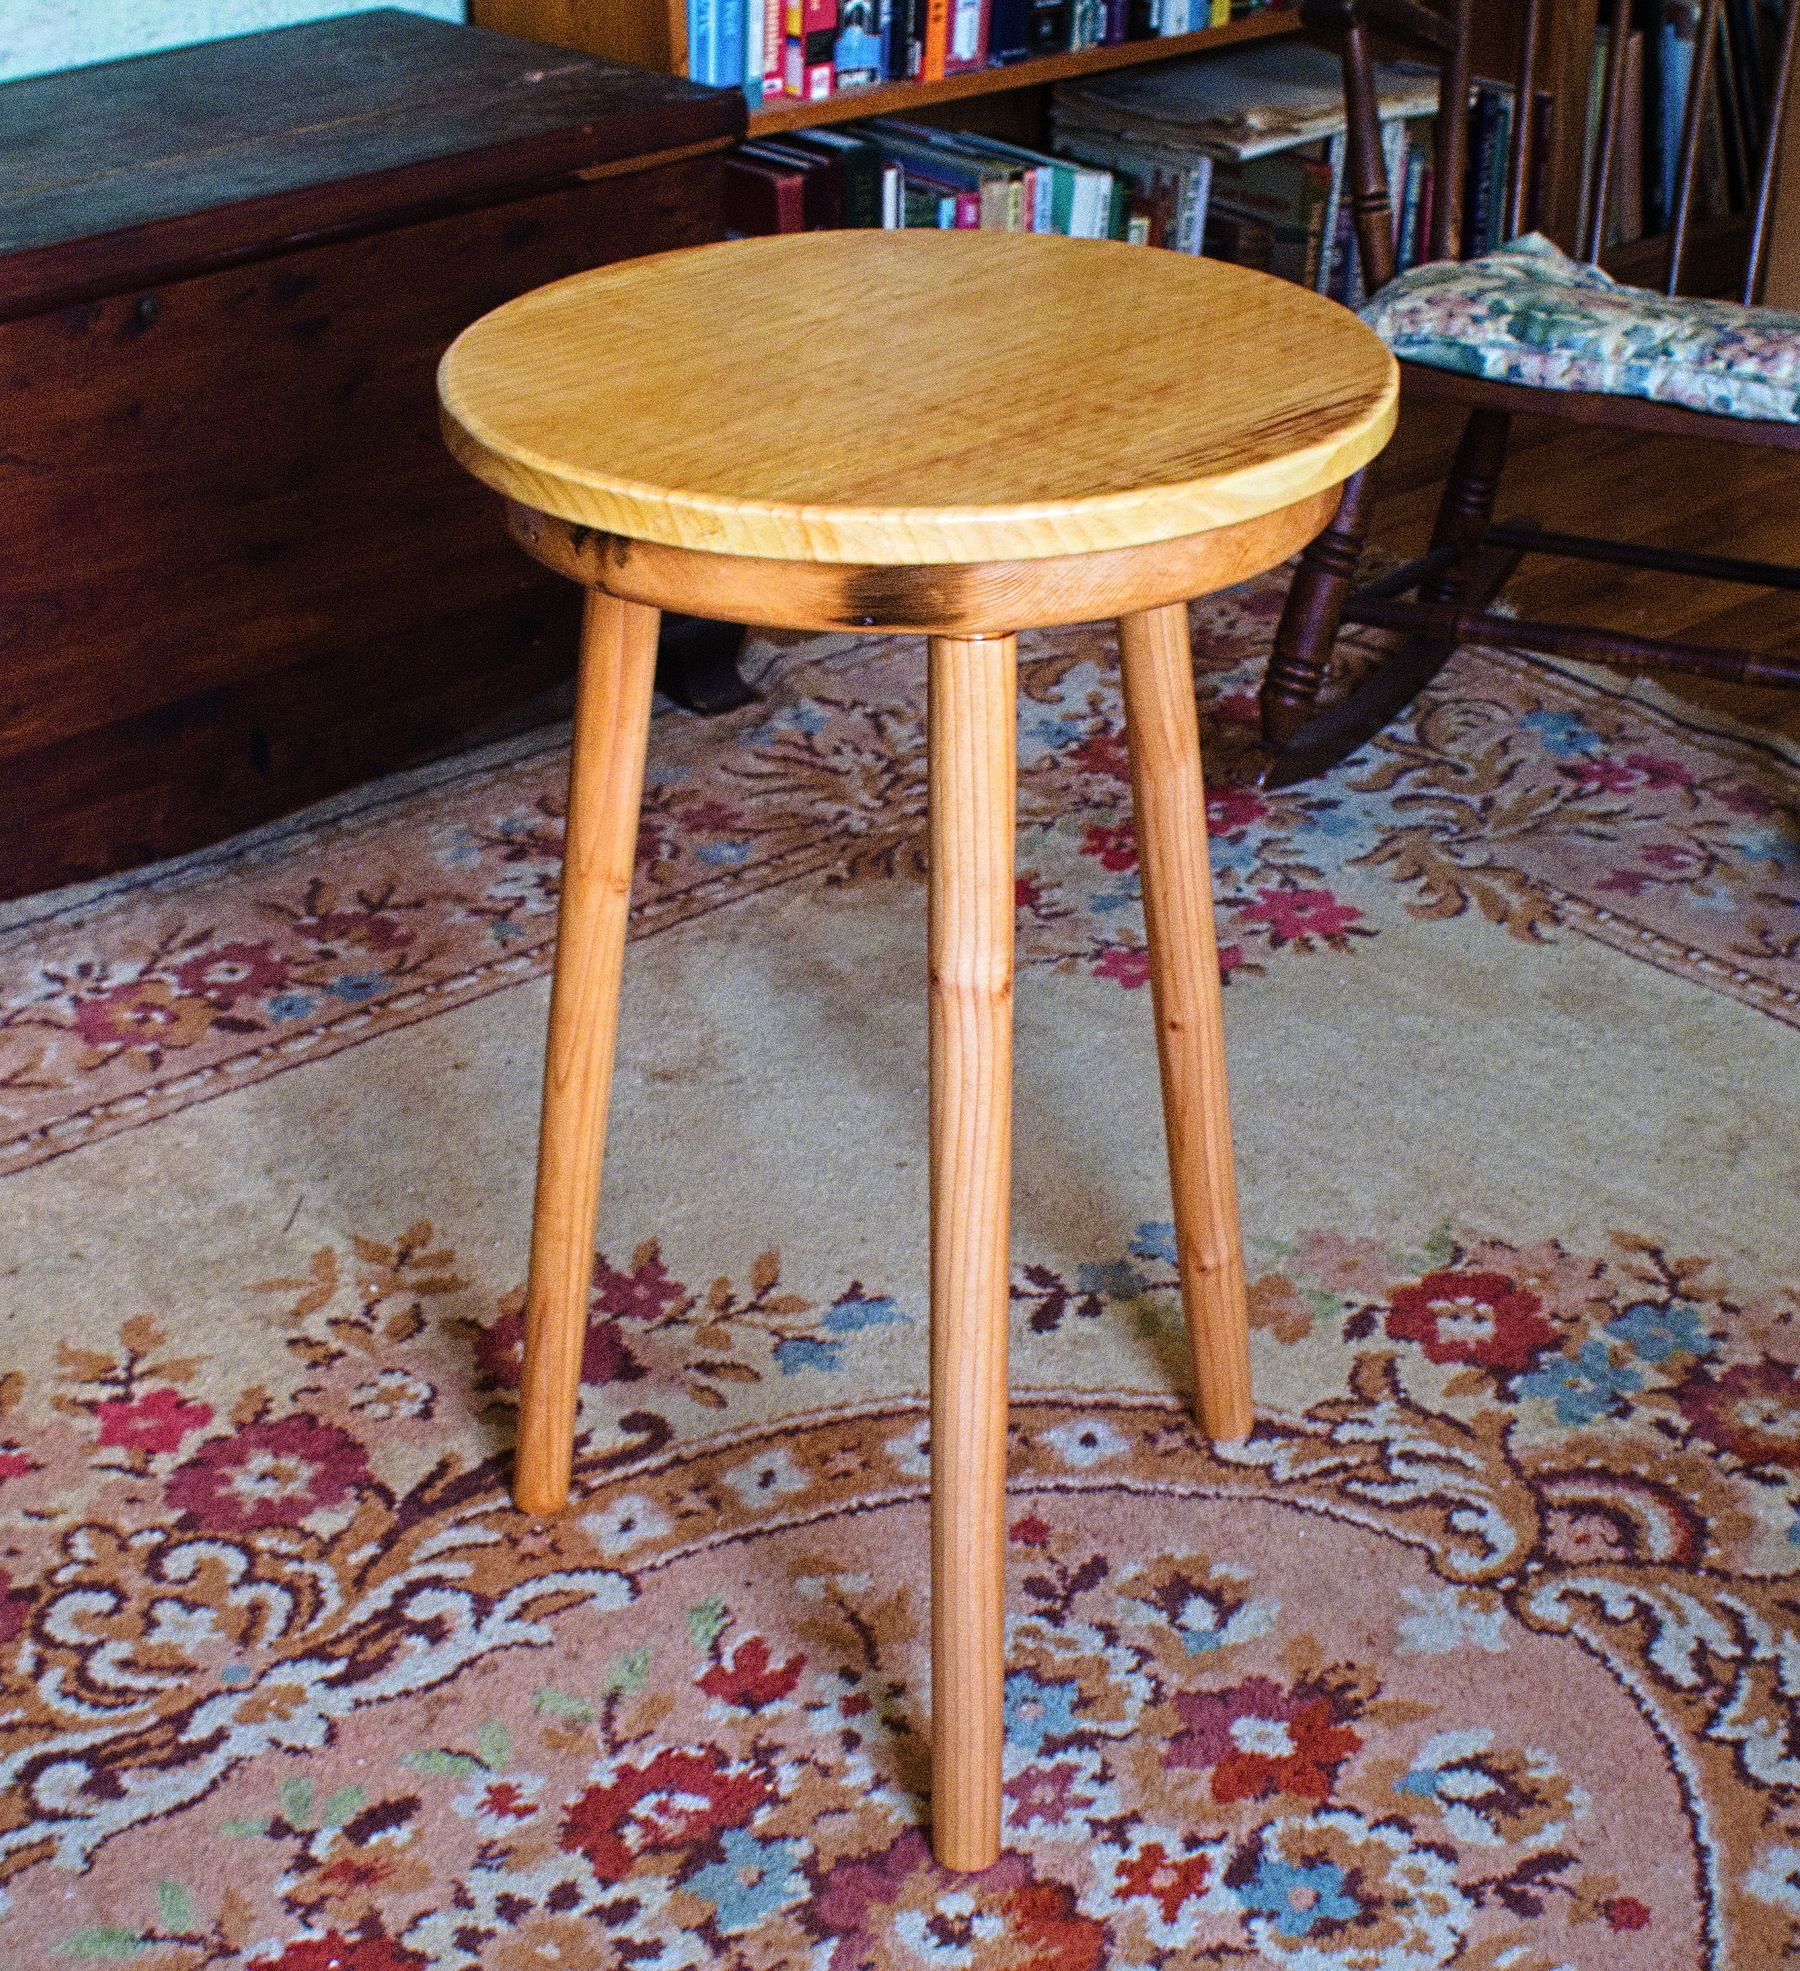
A woodworker friend gave Joe some commercial legs which he put to good use in this low stool. It's got an interesting look to it - medieval meets Ikea?.
February 3rd, 2021
Posted by Paul

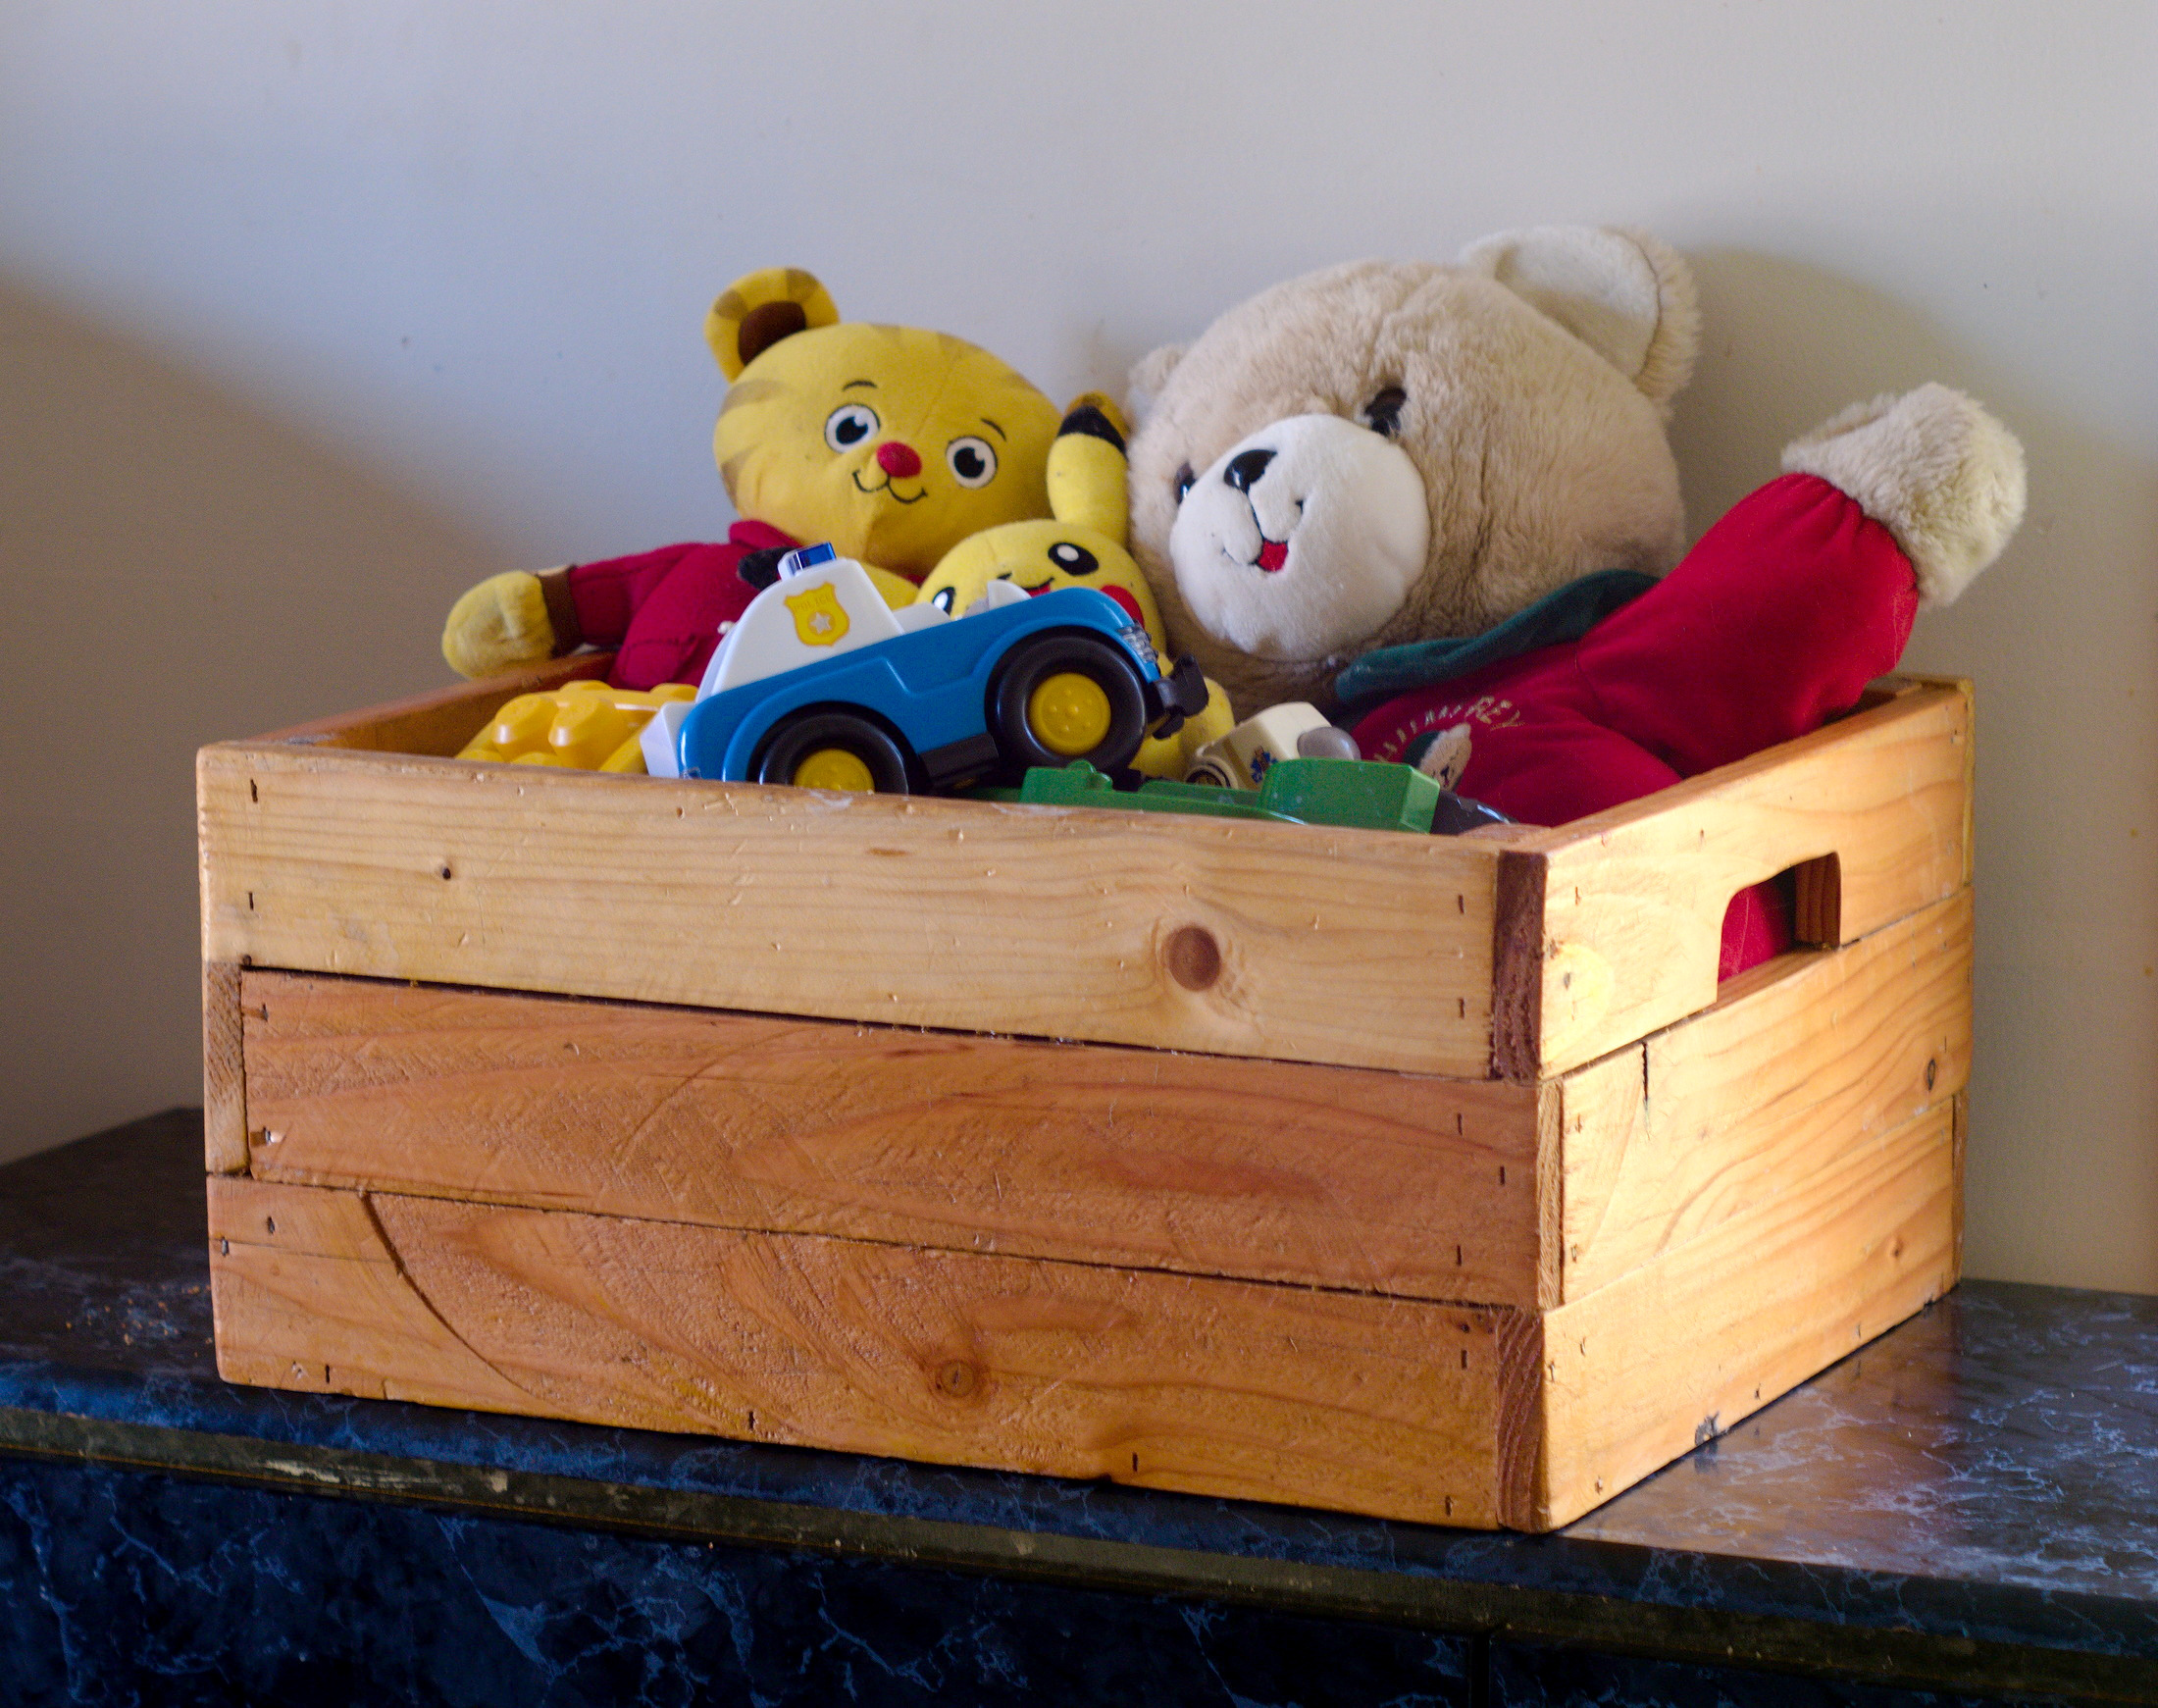
Young people often don't stay in one place for long, so Joe came up with a design for a moving crate that would look nice enough to serve as a lampstand/bookcase between moves. He has built several of them. They feature solid, simple joinery and repurposed beautiful cypress paneling. This one is a little different. Chances are it will stay in one place, so Joe was able to custom-build it to fit a location. It's for Zanna's boyfriend Dean, and he plans to keep it next to his easy chair at home. The hole in the back will allow wires to feed through so he can put his device chargers on the top shelf. Dean is a homebody who never moves so no need for hand-holds in the ends of this crate.
January 27th, 2021
Posted by Paul

The trestle table is coming along quickly. Today we lag bolted the cross members to the top through oversized holes to allow for wood movement, then notched the longitudinal brace around them and attached it to the top with glued and nailed brackets. Finally we cut long slots in the legs to allow the brace to be let down into them. Remaining to do - cut the tenons in the bottom of the legs and fit the feet.
January 21st, 2021
Posted by Paul

The bench in front of the visitors center at Bethania is a good two inches thick and 18 inches deep. I doubt if many modern sawmills would cut through a knot as large as this one. It wouldn't be marketable for dimensioned lumber. But some of the small independent operations might. Live edges are all the rage in woodworking these days. I think this board might be old, who knows, maybe chestnut.
January 14th, 2021
Posted by Joe

What to do with a 2 foot scrap piece of 4x4 treated lumber? I fixed my lathe so I needed a project to take it on a test drive. I made this mallet for use in Marcia's garden, so if she leaves it outside it won't rot for a while. Now I can have my mason's hammer back.
January 3rd, 2021
Posted by Paul

Canvas and sail work often involves running long, straight seams. Putting a sacrificial cloth along the edge of the jib for my boat Terry Ann required three stitch lines of 35 feet apiece, and three more of 12 feet. I broke them down into 30 inch sections, but even so, feeding the massive amounts of cloth under the needle made it a real trick to keep the seams straight.
The Sailrite catalog lists a long magnetic seam guide, like a fence for a table saw or router, nicely made of synthetic material, for $31.95. I figured we could make something just as good out of beautiful wood for a tiny fraction of that cost. We consider our time as free, since woodworking is what we do in our leisure, and the cost of materials would amount to next to nothing. We turned up a scrap piece of cherry that had a crack, but enough solid wood to cut out a couple of guides. I bought a box of 120 magnets, which will supply me for life. Each guide took two, at a cost of 9 cents apiece. Trifling quantities of epoxy and polyurethane finished up the materials list. All told, 50 cents apiece would be generous.
With two, that gives me one, and I think it will make the next big project easier, and one for Marcia. I'm not sure whether she sews any more, but she'd probably like one to put with her machine. As quick and easy as these are to make, we could turn them out en masse, but I don't know enough people who still sew to think that we could get rid of many. A couple for friends at the coast who do sailwork would probably be enough.
December 31st, 2020
Posted by Paul

Glueing another course to the train box, using every bar clamp in the shop, plus a fair share of C-clamps. We make a little progress on it each work session.
December 16th, 2020
Posted by Paul

Here is the picture and description from Wallace Nutting's Furniture of the Pilgrim Century. The whole book is well worth the read. It can be downloaded from archive.org.
December 15th, 2020
Posted by Paul
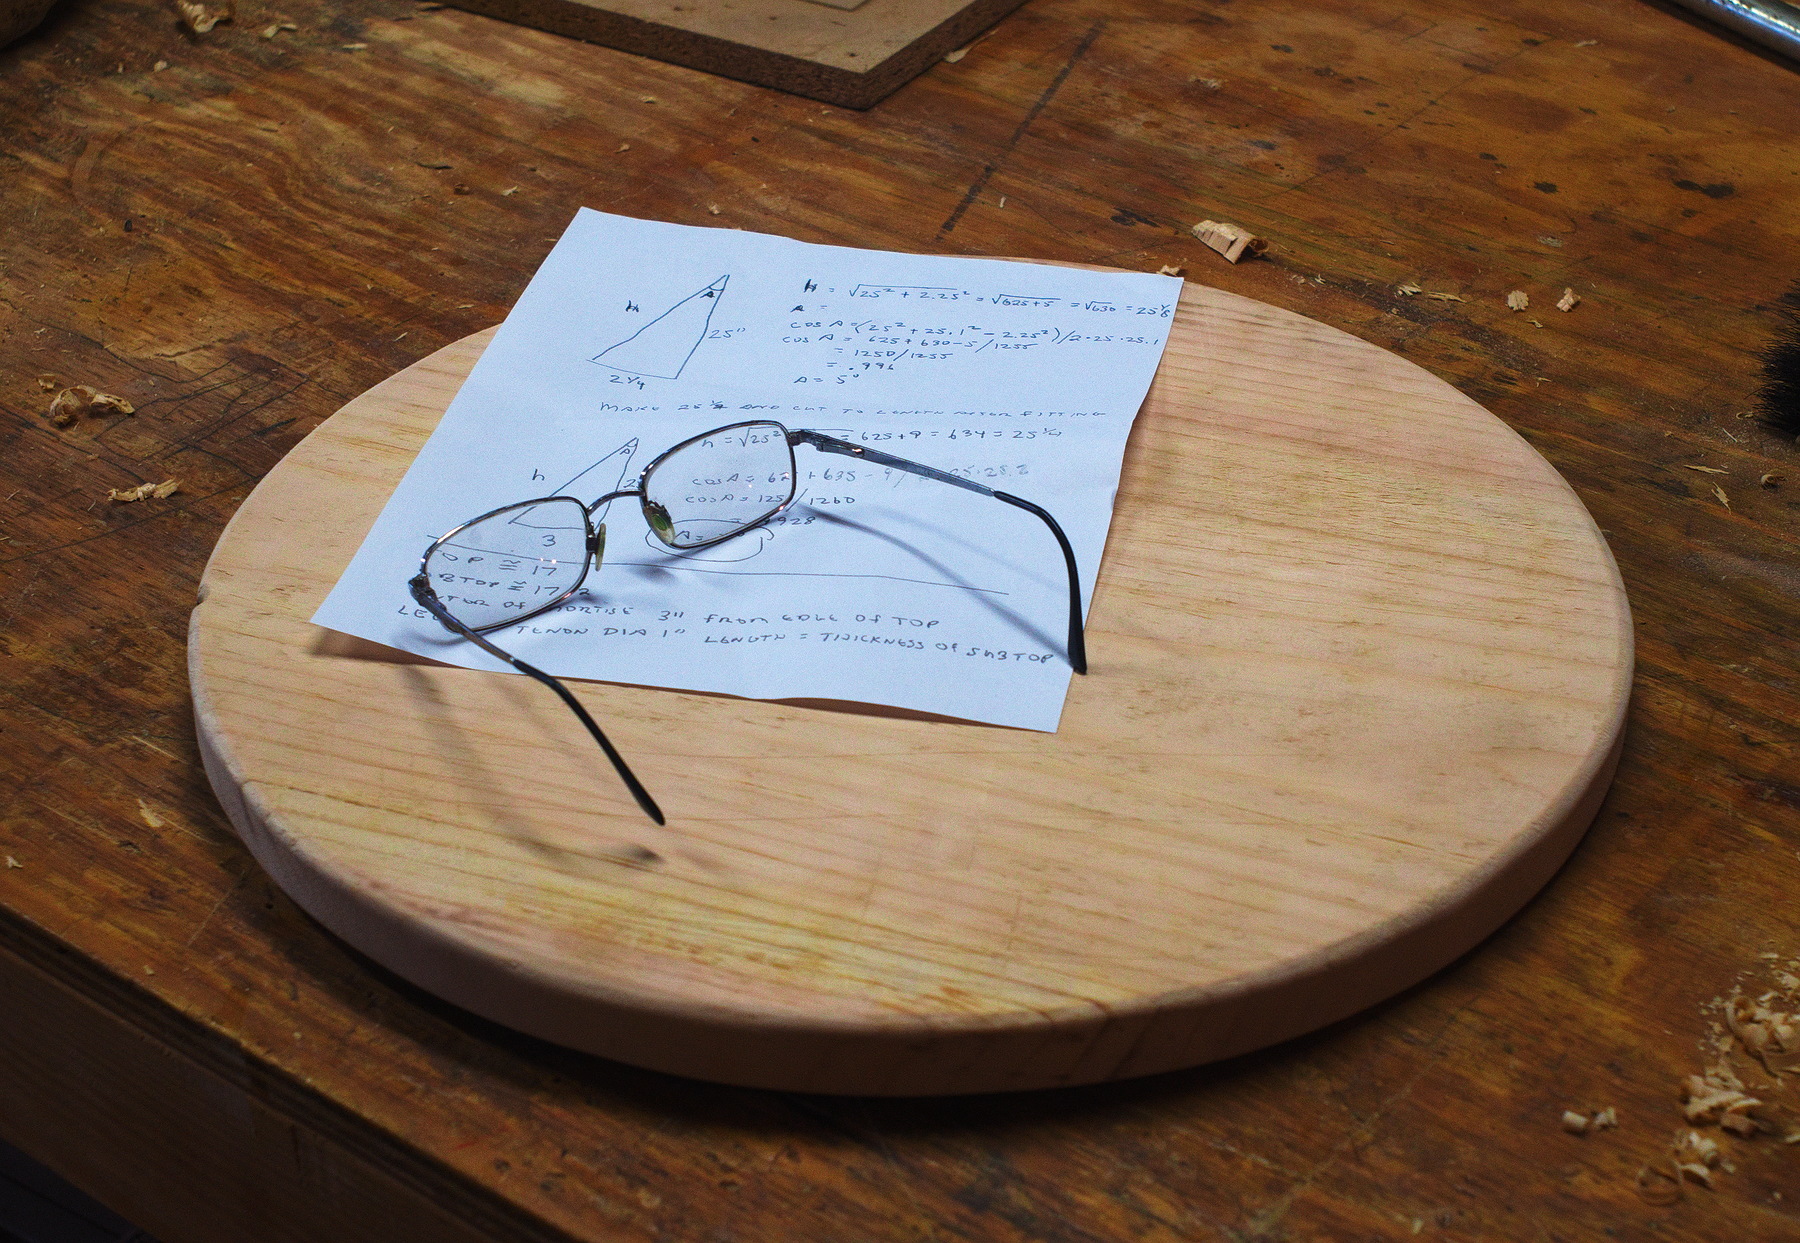
This white pine board measures 10 feet long, 17 inches wide and well over an inch thick. We bought it at Wall Lumber in May 2014, and it was 12 feet long then, but we cut two feet off to make a staked table for my boat. What is left will go into building the top for a trestle table that will be 5 feet long and 20 inches deep. The table will be modeled on the one at the top of page 344 of Wallace Nutting's Furniture of the Pilgrim Century, of which he notes "the ingenious stiffening brace is located at a point in which it is wholly out of the way, and effective, being let down into a slot in the trestles". The whole table will be easily taken down into its constituent pieces to make it easy to move. This follows our philosophy of building lighter, more portable furniture to suit the needs of modern people who move frequently and live in smaller houses. The large, ponderous items that require professional movers to handle are a burden on the owner.
December 10th, 2020
Posted by Paul

A pickup truck for Lex.
November 26th, 2020
Posted by Paul

We think we have built over 200 boxes and crates. Here are a few of them.
November 22nd, 2020
Posted by Paul

A big mallet that Joe made for wood splitting. He turned the head and handle on the lathe from green oak cut out of a recently downed tree. A crack developed so he banded the head with plastic straps cut from a soda bottle and heat-shrunk in place. He's hoping to get some good work done before the head comes apart, and then it can go back to being what it was meant for in the first place - firewood.
November 20th, 2020
Posted by Paul

Polyurethane on cedar. The first coat went on Dee's kitchen cart and a couple more coats will finish it. We started this project about a year ago but it hung fire in the very early stages. We got back on it in July and it looks like it will be out of the shop by sometime in December. That's the last of the big projects that have been taking space in the shop. Smaller projects in process include a box to hold Marie's old train set, a true treasure chest for Lars and Lex. I'm mulling over ideas for a trestle table to replace my computer desk, and we can always build more slide-top boxes.
November 3rd, 2020
Posted by Paul

We built this stand three years ago so that I would have a place to peruse my atlases and other oversized books. It has served that purpose well. I find that I use it even more for drafting things to build in the woodshop. The 12x18 paper that I like to use fits with room to spare.
October 27th, 2020
Posted by Paul

This small slide-top box, made of scrap cherry left over from another project, sits on the sewing table and holds the things I need for 75% of my jobs - scissors, seam ripper, pins, small screwdriver. Makes it a lot easier than digging through all the tools and supplies that almost never get used.
October 27th, 2020
Posted by Paul

Joe built this face vise while I was down at the coast working on my boat. The construction is similar to the Moxon vise we built years ago, but the edge of the bench serves as the back jaw. The core is solid oak, with plywood panel cladding that can be replaced if it gets scarred or damaged. The Moxon was solid ash. The Moxon sits on top of the bench and is good for getting work closer to eye level, for cutting tenons. This vise is lower and longer, good for edge jointing with a plane.
October 1st, 2020
Posted by Paul

When Mark's son Kyle bought a house in Raleigh, he found a stack of mahogany in the attic. It is now at the woodshop, and in appreciation Joe built him this step stool.
September 7th, 2020
Posted by Paul

Another picture of the kitchen cart.
September 7th, 2020
Posted by Paul

Making progress on the kitchen cart. We wanted to see how the finished product was going to look, so we dry-fit the top and the slats that hadn't been glued-up yet. This piece is going to require a lot of finicky sanding and finishing even after assembly is completed, so it still needs a few shop sessions. I'm going out of town so it will probably be mid-October before we can make delivery.
September 3rd, 2020
Posted by Paul

Our friend Ron from the PATH Wednesday morning breakfast group sometimes brings wood that he has turned up for Joe to take to the shop. Joe made this oak step stool for Ron in gratitude for his generosity.
We got to talking about how many of these step stools we have made, and I went back through the website to the first two, made from a single six-foot 1x12 from Home Depot. I found pictures of fourteen.
August 31st, 2020
Posted by Paul

Good height for working on the computer.
August 30th, 2020
Posted by Paul

Lars tried out his new stool today.
August 28th, 2020
Posted by Paul

Yesterday we got back to Dee's kitchen cart, cutting and fitting 24 tenons and then glueing up the ends. A few more workdays and this project should be done.
August 25th, 2020
Posted by Paul

Something we built back in early 2014, a trestle table in white pine and cedar for Marie and Levi. It's still solid, and looks better than ever.
August 24th, 2020
Posted by Paul

Joe took this picture after putting a couple of coats of poly on the stool that is going to stay at the shop. It's showing lots of color and figure in the poplar and yellow pine. Age will bring it out even more.
August 21st, 2020
Posted by Paul

Two four-legged stools were glued-up today. The one on the left is to go to my house, for Lars to use when he visits. It is a few inches taller than a standard chair, so he can sit up over the table, and it has staggered rungs so he can find a comfortable spot for a foot even as he grows. The other has h-stringers and a little more splay. Joe intends to keep it as a shop stool.
August 16th, 2020
Posted by Paul
The tapered mortise and tenon joints attaching the legs to the top are done on this stool for Lars. Next step is to make mortises in the legs to accept stringers. For an adult, stringers should be around 16 to 17 inches below the seat, to allow a person to rest his or her feet on the stringer. For a six year old, I plan to make the stringers on two sides at 12 inches and on the other two sides at 14 inches. This will allow Lars to use the stool for longer before he outgrows it. Plus, the staggered mortises will be stronger than if they were drilled into each other.
August 10th, 2020
Posted by Paul

The slowest job on record, we delivered the kitchen hutch to the Smith residence today. Exactly two years and one day ago, we bought the cherry at Wall Lumber with the intention of building this project. I designed this one as we went, which is my lame excuse for the hodgepodge of styles and techniques on display. The lower case is traditional mortise and tenon, paneled joinery, the upper section is boarded rabbet and dado cabinetry, and the back is ship-lap. But it all comes together, and everybody who has seen it wants one - not that we will ever make another.
August 6th, 2020
Posted by Paul

Even with unemployment at record levels and job insecurity a way of life, there are plenty of Americans who feel affluent enough to put solid, useful furniture out on the curb. I found this end table recently and gave it a light cleaning and coat of wax. There is nothing wrong with it - a few scratches and worn spots, but the joints are all tight. It's solid wood, a decent machine-made item that probably cost a pretty penny when it was new. There is a sticker for Gordon's Inc. of Johnson City, TN. Gordon's was a small but well-considered maker of furniture. They started business in 1947 and shut down in 1998. If Marie wants the table, it is hers, otherwise maybe I will give it to Habitat.
July 29th, 2020
Posted by Paul

Tapering a mortise with a shop-made taper reamer. Most commercial reamers use scraper blades set into the conical core, ours uses 36-grit floor surfacing paper. It is very laborious and I wouldn't do another with a thick sub-top, but for thinner material I think it would make for a stronger joint than a straight mortise.
July 26th, 2020
Posted by Paul

Delicate, almost translucent shavings coming off green poplar.
July 25th, 2020
Posted by Paul

Riven poplar and mahogany planks. I don't know what we can do to thank my friend Mark enough, but he has bestowed upon us green poplar, riven straight from the 30 inch diameter trunk, and mahogany, possibly Philippine mahogany that was used in the 1970s to crate Honda motorcycles for delivery to the U.S.
Starting with the poplar - I have an interest in seeing how green wood works. From what I have read, it planes and turns more easily than kiln-dried wood, and is stronger and more stable because it follows the grain. Mark picked up a six foot log of poplar along with some oak from a contractor who was preparing a nearby site for building. He worked up the oak for firewood and dumped the poplar on the back of his property, joking with his sons that they would make a totem pole out of it someday. When I mentioned that I was looking for a length of green wood to experiment with riving and turning, he offered to cut off a length of poplar and help me split it. We worked some up for me to take it to the shop and try out, and if it is planable and turnable I can get more.
As for the mahogany - Mark's son Kyle found a considerable stack of milled wood in the attic of a house he is buying, and asked his father if he wanted it. Mark immediately thought of Joe and me and brought some of it home for our examination. What is pictured here is a small part of it, since I had to carry it home in the trunk of my car, and there is even more at Kyle's house in Raleigh. The nails in the plank ends and cryptic stenciling make me think this may be crate wood. Woodworking magazines from the 1970s make mention of finding mahogany crate wood at motorcycle dealerships as Honda, Yamaha and the other Japanese manufacturers used wood from the once vast Philippine mahogany plantations to crate up bikes for export to the United States. Philippine mahogany is somewhat distantly related to the Caribbean mahogany that was used to make much of the fine furniture in America and Britain during the 1700s and 1800s. It is commonly known as luan or meranti. Despite being from a completely different genus, Philippine mahogany looks a lot like real (i.e., Caribbean) mahogany, and has many of the same characteristics. it is a decent substitute - not as good as the African mahogany that Joe turned up a couple of years ago, but decent. The subject of mahogany is complex, and the best explanation I have found is at wood-database.com, Mahogany Mixups - The Lowdown.
July 24th, 2020
Posted by Paul

The picture is from the book American Furniture in the Metropolitan Museum of Art: 1. Early Colonial Periond. The Seventeenth Century and William and Mary Styles.
The Metropolitan Museum of Art has made a gift to woodworkers in the form of their publication, American Furniture in the Metropolitan Museum of Art: 1. Early Colonial Periond. The Seventeenth Century and William and Mary Styles, (henceforth American Furniture), by Frances Gruber Safford. Over the years, the Met has published over 1,500 books, many of which are out of print. In an act of generosity and in keeping with their educational charter, the Met has made many of these out of print books available for free download at MetPublications.
American Furniture is a catalog of pieces in the Museum collection, not a history or survey of the period types. All the catalog numbers were studied, researched and photographed specifically for this book, which was published in 2007. While some items may appear familiar to readers of Wallace Nutting's books, the modern color pictures are leagues ahead of anything Nutting could accomplish 100 years ago. In addition to the photographs, each item is accompanied by an introductory description and sections on construction, condition, inscriptions, woods, dimensions, earlier exhibitions, references and provenance. The book is a fairly technical work that rewards a familiarity with woodworking methods and the common styles of the period.
The photograph leading off this review is from American Furniture, Catalog Number 52, page 134. It is of a small joined table, in the opinion of the Museum staff built in Rhode Island between 1720 and 1750. The introductory matter describes it and similar pieces as "larger than a traditional joint stool but not any higher", and "probably intended as low tables or stands rather than seats, though in practicality they could serve as both". The section on construction states "[T]he frame, secured with standard mortise and tenon joints, has legs that are strongly splayed in two opposite directions (about 9 degrees from the vertical). The outer corner of each leg block has been finished with a small chamfer. There are variations in thickness between and within the individual rails and stretchers. Evidence of mill sawing remains on the inner side of three of the rails".
There are 134 catalog numbers listed in the main body, plus seven more in an appendix of remnants and pieces of questionable provenance. The earliest items date back to the 1640-1660 timeframe and are comprised of spindle-backed, turned chairs similar to the familiar "Bradford" and "Brewster" chairs. From the same era is a truly medieval-appearing joined armchair, plus a bizarre table with a top that folds back to reveal an armchair. In the chair configuration, "the expanse of the back provides an impressive backdrop for the sitter".
From the early 1700s the book presents a couple of aged and weathered, but still intact, joint stools. These little pieces got the most and hardest usage of furniture in the Pilgrim century, and few of them survived. Fortunately they are easy to construct, and I think every household should have at least one of them. We have not built one yet, though we have built an example of its big sister tavern table, and several of its predecessor staked stools.
American Furniture catalogs couches, easy chairs, settles, many, many tables, boxes and chests. The one thing not in the collection is staked furniture, (other than early staked chairs), the vernacular. During the golden age of Pilgrim Century collecting, from the 1880s to the 1920s, nobody really considered staked items to be worth collecting. Again, the chairs were the exception, since they could be associated with the founding fathers. Anyway, it was hard to tell what was truly old, since the forms had continued, under the radar, in rural communities away from the urban centers of culture. Essentially, it is impossible to tell a three-legged stool built in 1625 from a three-legged stool built in 1750 from a three-legged stool built in 1875. The 1880s saw the beginnings of the colonial reproduction industry, as families wanted to demonstrate a real or imagined lineage to pre-Revolutionary days. Three-legged stools of the 1880s were not reproductions - they were the real thing.
William and Mary was the bridge between the medieval/rennaissance styles that the Pilgrims and Puritans built in the earliest years and the modern Queen Anne, Federal, Chippendale and later styles. The book includes a few William and Mary pieces, but the emphasis is on the earlier styles. One of the latest pieces catalogued (number 55) is an oval-topped table with a scalloped skirt and Spanish feet that is trending on Queen Anne style. It is a good example of how cabinet makers sometimes incorporated new stylistic features into their work to make it attractive to fashion-conscious consumers. If anyone thinks fashions and fads are something new, they need to look at the history of furniture.
For the woodworker wanting to see how the furniture of the Pilgrim Century looked, and learn how it was built, this book is the best resource short of visiting the Met, or one of the few other museums with similar collections. It can be downloaded at this link.
July 19th, 2020
Posted by Paul

The heavy sub-top is glued onto the top for a four-legged staked stool we are building for Lars. The thickness will provide plenty of bearing surface for the legs, insuring long-lasting rigidity.
In the background, eight rough-turned poplar stool legs.
July 19th, 2020
Posted by Paul

The cedar cart is joined by 24 mortises and tenons. We cut the mortises today, using a forstner bit on the press and cleaning up with chisels. The sharp new bit made clean overlapping holes, and the straight-grained cedar made for easy chisel work. We only drilled one hole on the wrong edge of a face, and Joe handily split and carved a dowel to plug it.
July 13th, 2020
Posted by Paul

Cedar top for a kitchen cart in the clamps, eight poplar blanks sawed out ready to go on the lathe to make legs for two stools, the stool tops behind, and at the back rails and posts for the cart. Oh, and two Sam Adams lagers ready to be opened after a highly productive day of shopwork.
July 5th, 2020
Posted by Paul
Another afternoon of work and Joe's table is constructed. Two days has got to be a record for us to build a substantial piece of furniture. The credit goes to the use of salvaged wood, the simplicity of the joinery and division of labor. We saved a lot of time milling the parts for the top and glueing them up by using a piece of salvaged piano that Joe turned up recently. The staked legs, wedged into a thick batten and attached to the top by a sliding dovetail, proved a lot quicker to make than traditional mortise and tenon parts. And since Joe has been doing a lot of turning lately and is in practice, he worked on fitting the legs while I cut and chiseled the second sliding dovetail (we cut the first one last session).
With the legs fitted, inserted into the battens and wedged, the moment of truth was driving the battens into the sliding dovetails. Nothing cracked or broke. The fit was tight enough that we didn't use glue. That means the battens could be driven out if needed to repair or move the table.
July 3rd, 2020
Posted by Paul

Chapter 10 of Chris Schwarz's Anarchist's Design Book covers building a staked worktable. He introduces the chapter by stating "[t]he genesis of my version of this worktable was actually a Moravian stool that I copied years ago from the collection at Old Salem in North Carolina. That remarkable stool led me to look for examples of furniture that used the same technology on a bigger scale". We built one of these stools ourselves in May 2018, completely with hand tools, with riven wood from a round of Leyland Cypress that I picked up along the road. It was a first introduction to staked legs and sliding dovetails. We didn't go on with the form, but the stool is still in the shop and frequently put to use during our regular after work drinking session.
Joe recently picked up most of the wood from a scrapped piano, including two big glued-up poplar panels that were a good size for table tops. He wanted a table to serve as a desk in his office, and we decided that Schwarz's staked worktable would be a good model. The lathed, tenoned legs inserted into splayed mortises were no different than the ones we made the last couple of weeks for stools. We had built rough sliding dovetailed battens for the Moravian stool, but with Schwarz's instructions we thought we could make some neater, more workmanlike ones for this table.

We used some thick pine stock from the piano for the battens and cut the bevels on the table saw. Then we cut the walls for the first dovetail slot with a big rip saw and took turns hogging out the waste with a chisel. To our great satisfaction, in not much more than an hour we had it fitted. We decided to save the second slot for next time.
Earlier in the day we had been up to Wall Lumber in Mayodan for 8/4 and 6/4 stock. We rarely have to buy wood but large dimensioned boards to cut blanks to lathe into legs is not something that turns up frequently. We bought ash, maple and poplar. The last work of the day was to cut some maple blanks that Joe can turn as he has time, to stake into the battens.
July 2nd, 2020
Posted by Paul
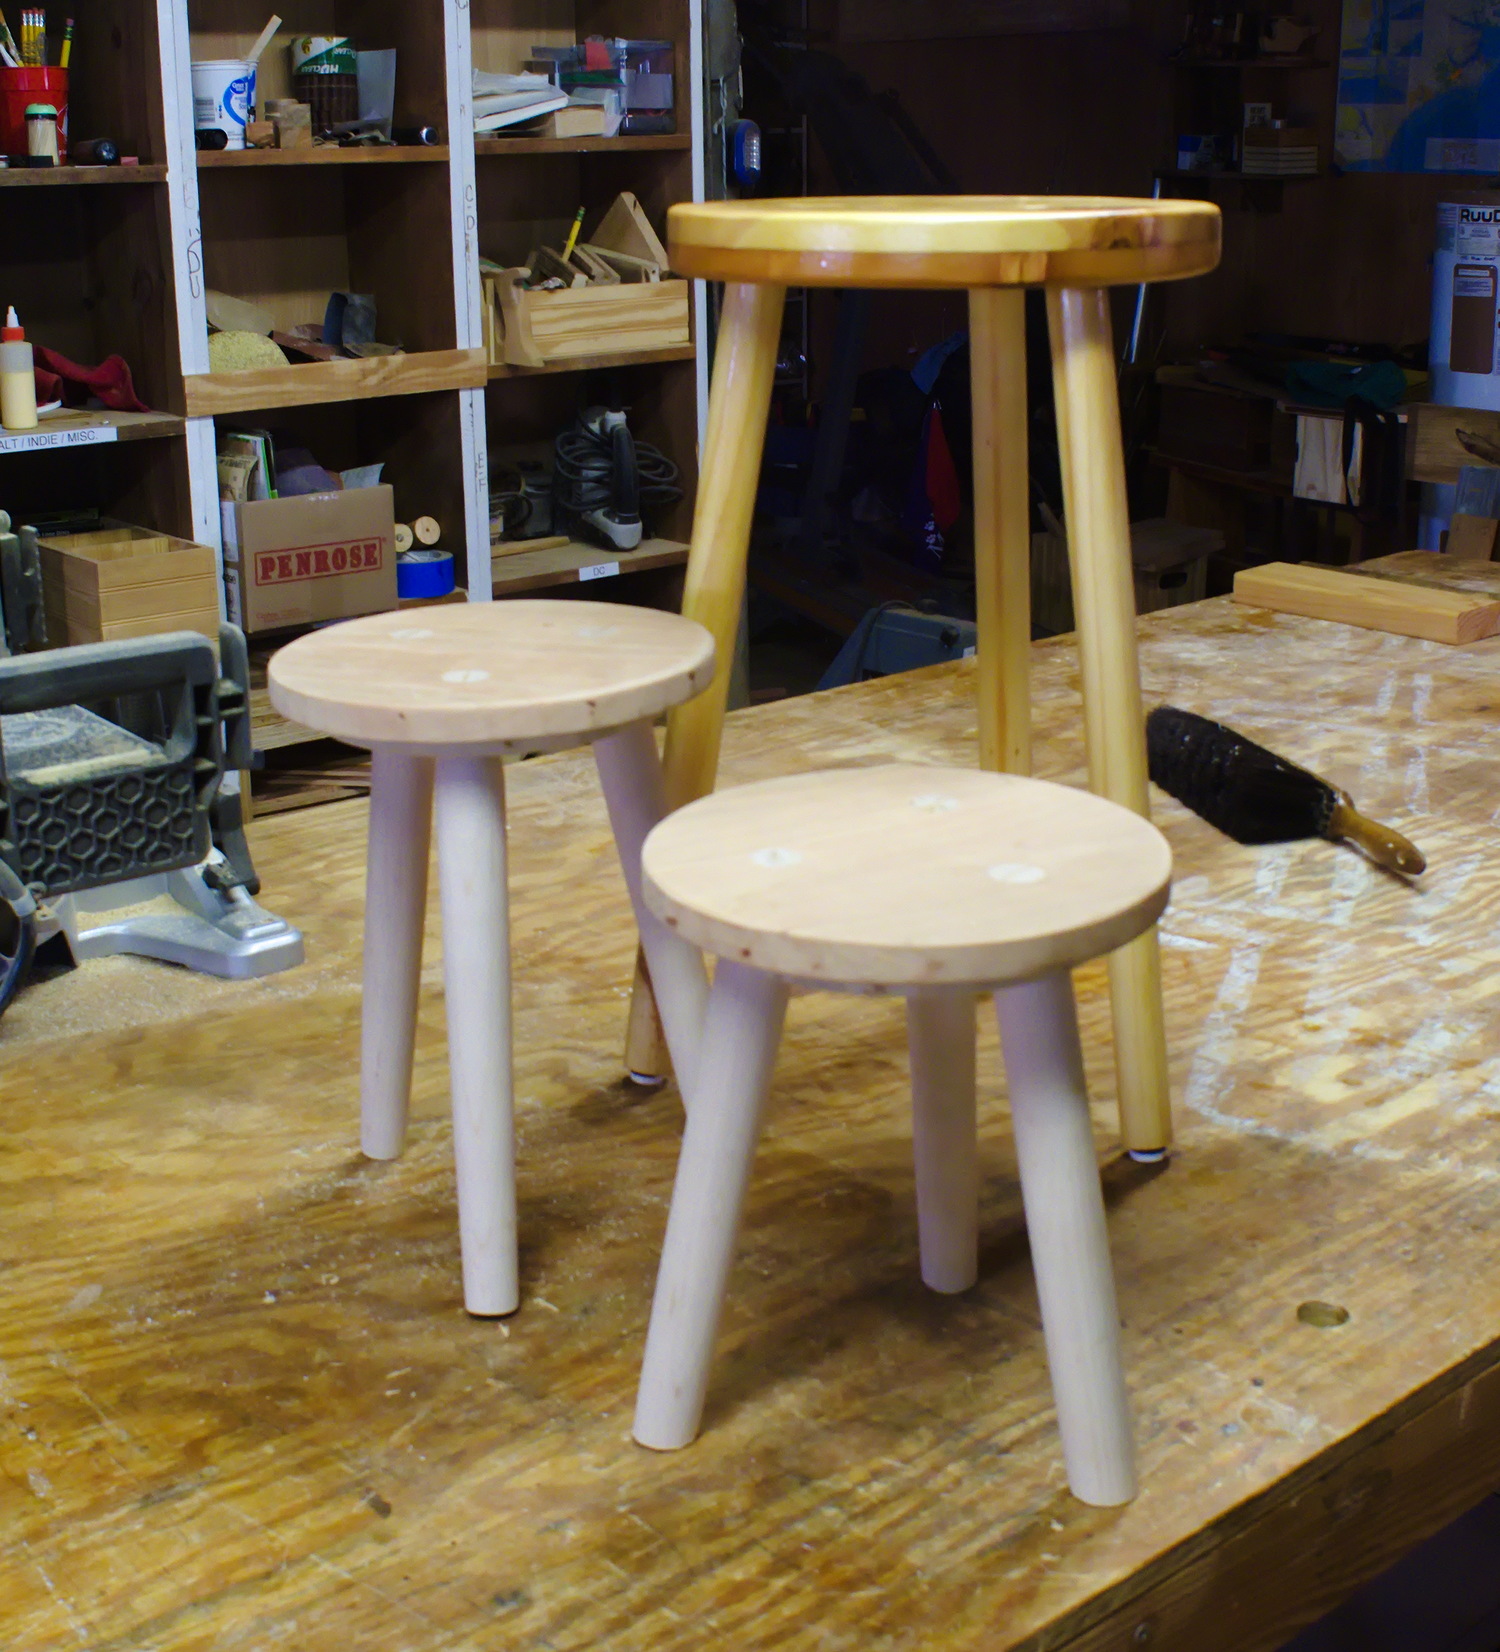
The stool Joe built last month along with two more we completed yesterday. The smallest one will be for Lex and the other Joe plans to put in one of the Firefighters' auctions.
June 22nd, 2020
Posted by Paul

The boat table is on the boat, demonstrating its versatility by supporting book, glasses and beer in the cockpit. With a spar varnish finish, it stands the afternoon sun with equanimity. Below deck, its light weight means I can position it wherever I need it, whether it is a breakfast table in the morning, a workspace in the day, or a berth-side stand at night. And when it is time to sail, it breaks down for stowage in the mid-ships locker.
June 11th, 2020
Posted by Paul

Here we have Joe's stool. Like the boat table, it went together quick and easy, no problems. We both enjoyed these projects, so we decided to continue with the staked, three-legged, round-top form and make a pair of small, kid-sized examples. We found a cherry board nine inches wide to make the tops, some scrap from a parted-out street find drawer for the sub-tops, and a length of 6/4 maple that we cut into legs. Joe will lathe the legs as he has time. We will drill out the mortises and assemble them next time I get over to the shop.
June 9th, 2020
Posted by Paul
One thing Chris Schwarz notes in his Anarchist's Design Book is that the beautiful Queen Anne, Chippendale, Hepplewhite and Federal furniture we associate with the 18th and 19th centuries was made in small quantities since only the wealthiest homeowners could afford it. Machine-made furniture of the late 1800s allowed the growing middle class to have a simulacrum of what they saw in the dwellings of their betters. Until then, most people furnished their homes with sturdy, useful but plain stick-built chairs and tables, and boarded, nailed shelves and cabinets. Many men could build their own or find a local craftsman to do it on barter.
My knock-down table for the boat was built on the principles of utility, available wood, simple joints and quick, easy construction. The top was taken from a large board of yellow pine that I have had for several years, the sub-top from some of the last of the pine we salvaged from Mark's burn pile, and the legs from a construction-grade 2x4 we found laying around the shop. While an orbital sander would have made short work of the planing marks on the table top, I decided to leave them alone, in the spirit of vernacular furniture from a time when sandpaper was an unaffordable luxury. I just gave the whole piece a quick rubdown with 220 paper, a coat of ragged-on thinned polyurethane to raise the grain, and three brushed-on coats of spar varnish with light sanding between each.
This turned out to be an easy, quick project and a welcome break from boxes.
June 4th, 2020
Posted by Paul

On arriving at the shop today I found that Joe had lathed out the legs for my table. In addition, he had glued up a top and made the legs for a stool. We cut out the sub-top for the table, and the top for the stool (no sub-top, the tenons come right through the top and are wedged). Then we drilled the mortises, 1 1/4 inches in diameter, on the press, using a slanted jig to present the wood at a 7 degree angle. Some judicious lathing and sanding was needed to fit the tenons into the mortises, but nothing too difficult. Joe buttered the tenons for the stool with glue and drove them home, doubly securing them with wedges. I glued up the top and sub-top of the table. The legs for it will be left a press fit in the mortises so they can be taken down for storage on the boat. By the end of the day both projects were complete except for cutting the tenons of the stool off flush with the top, sanding and finishing. I took the table home with me to have work for my free time. I expect Joe's stool will be finished by the next time I get to the shop.
May 29th, 2020
Posted by Paul
A common theme in medieval and rennaissance art is a group of people gathered around a table outdoors, drinking, eating and carousing. Free-thinking woodworker, author and proprietor of Lost Art Press Chris Schwarz postulates that the revellers must have carried the tables to the party location in pieces and assembled them there. This is the inspiration for what he labels a "drinking table" in his recent tome The Anarchist's Design Book.
The drinking table is of simple construction - a top, a sub-top, and three splayed legs which tenon into the sub-top. The tenons fit tightly, but are not glued or wedged in place, so they can be twisted free, allowing the table to be moved in pieces. It occured to me that this would also allow the table to be stored flat.
The table on my boat is a massive affair that folds up against a bulkhead on a long hinge. It is heavy and difficult to set up and take down, and it takes up most of the floor space in the saloon. I have long considered how to build a small, light table that would be easy to knock down for storage. That would serve my day-to-day needs and I could keep the big table folded up unless I needed it for company. Chris's design for a drinking table looked like a good starting point.
I have a pine board 17" wide and about 10 feet long that I bought a few years ago with the intention of building a six-board box. As it stands, as much as I would like to build a six-board box, I have no room for one at home and I don't really know anybody else who needs one either. So I decided to use a bit to make my boat table. My design called for a round top, a thick, slightly smaller sub-top, and three turned legs with tenons to match the match mortises in the sub-top.
The construction processes on this job are for the most part familiar. We turned legs for the tavern table. We made splayed mortises and tenons for the legs of the Moravian stool. But what we hadn't done is cut a large circular top. This work is usually done on a bandsaw, but we don't have one, so I investigated other ways to do the job. I found an article about making a jig to cut circles on a table saw, an idea that seems outlandish on the face of it, but after watching this youtube video, I was open to trying it.
Suffice it to say that it worked perfectly. With the top made, we went on to glueing up a sub-top, cutting stock for the legs and turning a first leg on the lathe. Next session we will finish the other legs, cut out the sub-top, drill the mortises, and glue the sub-top to the top. After that, a light sanding and a few coats of polyurethane or spar varnish and it will be done.
May 11th, 2020
Posted by Paul

First shopwork in six weeks. We built a couple of locust mallets and milled out quite a lot of old heart pine from the salvage wood Mark gave us.
April 3rd, 2020
Posted by Paul

I found a catch for the burl-topped box online.
March 31st, 2020
Posted by Paul
Here's the liquor cabinet in place on the boat.
March 24th, 2020
Posted by Paul

Last time I was at the shop I proposed taking a couple of projects home to finish. Joe was agreeable, and they have given me a chance to do some productive work while social distancing at home. We are not under "shelter in place" in Winston-Salem yet, which I attribute partly to the quick actions of the city government in closing down restaurants, bars, and non-essential services, and partly to the stolid nature of the old Moravian stock, many of whom practice social distancing in all times, good and bad. So far, we have very few cases of Covid-19 in the Triad, with most of the North Carolina outbreak concentrated in Raleigh/Durham and Charlotte. But even so, I have cut my own grocery store trips and made an effort to stay home as much as possible. It has been nice to be able to spend some time each day on shop work.
In front is the burl-inlay cherry box. The inside of the lid is almost as spectacular as the outside. The cherry wood is from a lot I bought at Wall Lumber a while back. It is essentially "trash" wood, narrow boards with knots, splits, rough edges and internal stresses, things that make it hard to work and less desirable to professional cabinetmakers trying to make production. On the other hand, this kind of wood has better figure than straight-grained stock, and we like figure.
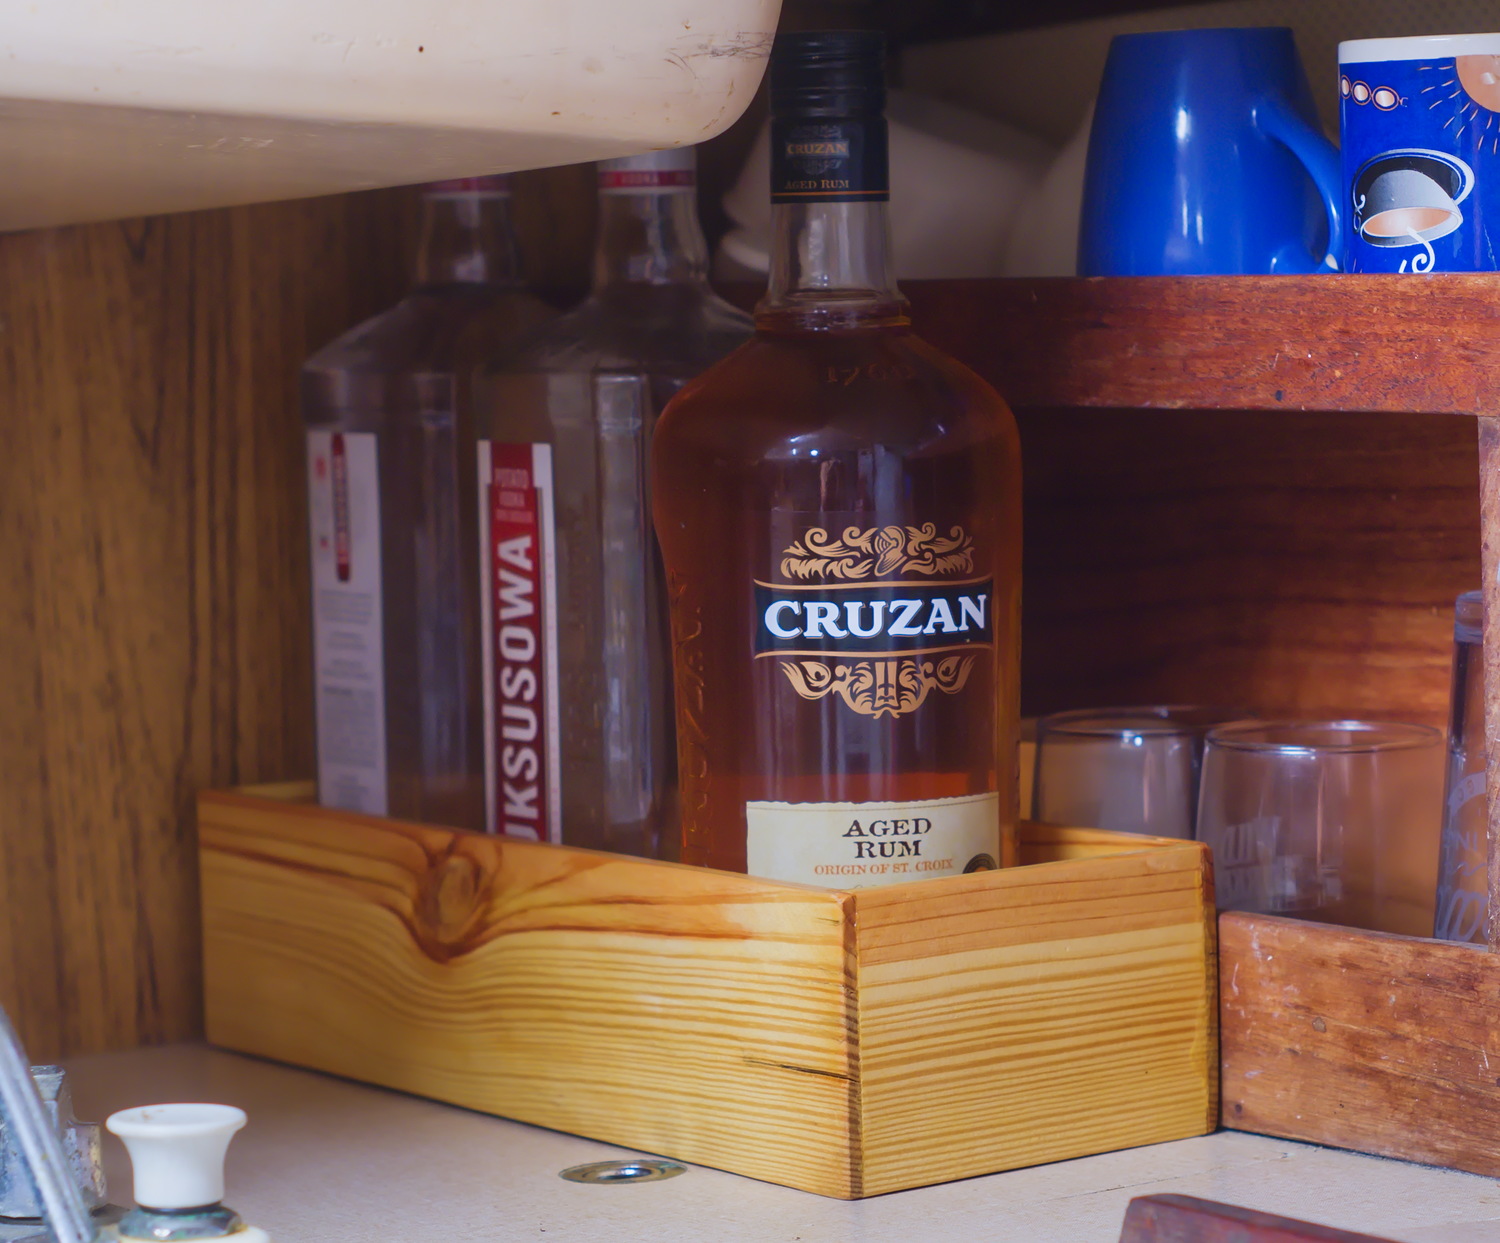
Behind is a tray to hold up to three half-gallon bottles of liquor. This will wedge into an area on my boat and prevent the bottles from ending up on the cabin sole when we are making to weather. Joe refers to this tray as "the liquor cabinet". Clearly the Cruzan stock is running low, this second week of social distancing. But the ABC is still open, and I'll make a visit soon. The local ABC has gone back to something I never expected to see again, counter service. You go to the door, tell them what you want, and they bring it to the front for you. In the meantime, I will break into the Luksusowa.
March 18th, 2020
Posted by Paul

Cherry box with burl inlay top. The first coat of thinned finish has been rubbed on.
March 5th, 2020
Posted by Paul

A box top with cherry burl inlay. It needs a little more filling and sanding, then it will be ready to be finished and hinged onto the box. The polyurethane finish will intensify the colors and contrast.
February 29th, 2020
Posted by Paul

Back in August of 2015 we built a rack to hold my computer and external hard drives. It has served its purpose well, and ought to hold up long after the electronics are gone. I have to conjecture that in 50 years someone will look at it and wonder what it was for. The mini-ITV motherboard format that the Shuttle is built around was considered very small for the time, but my next machine will probably fit in one of the hard drive bays, or just plug in to a port on the hub of whatever flavor of USB is running by then.
February 22nd, 2020
Posted by Paul

The Toughbook box with five coats of spar varnish and a lid support. It's ready to take to the boat with me next time I go, but there are a couple more details for when we have time. It needs a slot for the power cable to pass through when the lid is closed, and it needs a handle. I may also glue in some padding so the computer can't slide around inside the box.
February 15th, 2020
Posted by Paul

I am setting up a Panasonic Toughbook as a chart plotter on my boat. As sturdy and weather-resistant as these machines are, a little extra protection is worth having in a marine environment. We built this box out of locust to hold the Toughbook. It is finished with a coat of penetrating epoxy, and I am in the process of layering five coats of Minwax Spar Urethane over that to provide UV protection. We will add a handle and a lid support hinge later, for now I need to get the box finished so it can go to the boat for the next trip.
Locust is not known as an especially attractive wood, but Joe and I both disagree with that assessment. The logs we processed to get our stock had been laying on the ground for perhaps 10 years and there might be some mild spalting contributing to the figure. We also purposely left some saw burns in the wood for visual interest. Locust is high in silica content and very hard, thus the circular saw leaves a lot of burns. Even so, it splits, planes and sands easily (planes with a Stanley bench plane, that is - it would probably be the dickens on a power planer). So, once past stock preparation, a pleasant wood to work.
February 2nd, 2020
Posted by Paul

Our friend Mark cut down a cherry tree on his property a while back and saved some burl wood for us. Today we started sawing off 1/4 inch slabs that can be used for inlay. This should make for some spectacular box tops. The figure will pop once a coat of finish goes on it.
January 16th, 2020
Posted by Paul

After a year of work, this cherry case, the lower part of a kitchen hutch, is almost complete.
January 13th, 2020
Posted by Paul

A couple of kitchen mallets, yellow locust heads and maple dowel handles. Joe milled the points on his new router table.
January 11th, 2020
Posted by Paul

The first time Lars got the wheel off the truck we glued it back on. The next time, I epoxied it to make sure it didn't come off again. This time he broke it off at the axle.
January 11th, 2020
Posted by Paul

An early project from December 2013, this small tool tote that we made for Levi and Marie is holding up fine. I went into it yesterday, for a screwdriver to replace a cover plate on an electrical outlet. Lars and Lex break things playing and Levi is a complete klutz at fixing them. It's a convenience to me to have a set of household tools all in one place when I make repairs.
January 8th, 2020
Posted by Paul

Joe worked up a few of these medal holders out of bits of nice wood left over from other projects.
January 2nd, 2020
Posted by Paul

This exceptionally well-preserved old Stanley Bailey #4 came from an antique mall in central Florida. It's not too often you find a deal on a bench plane any more, since everyone can see what they sell for on Ebay, but I got quite a deal on this one - $30.50, including tax. Maybe the seller wasn't able to make the identification that this is a desirable Type 11, made sometime between 1910 and 1918, even though the three patent dates, low front knob, and small adjuster nut are a dead giveaway. It's a real beauty, with a gorgeous rosewood tote. The only defect is some slight gouging on the back of the mouth that I hopefully can clean up with a file. I'm looking forward to giving this plane a good fettling and putting it to work at the shop.
December 20th, 2019
Posted by Paul

OK, Joe convinced me. If you include crates, we have probably built about 200 boxes and crates. We counted at least 20 in use in the shop, 5 more waiting for disposition, and I'm sure Marcia has 20 or so upstairs. I counted 13 more at my house. We have given away boxes by the dozens to friends and family. They have been big sellers at the charity auctions. So, yes, it could well be. And we're not done yet. Just the other day we milled out enough locust and pine to start another production run of 8x10 slide tops. I'm thinking of changing the name of this website to The Box Factory at Joe's Basement.
December 17th, 2019
Posted by Paul

Joe thinks we have made 200 boxes, which seems outlandish to me. I think maybe more like 100. Here is a small box out of cherry scraps, offcuts and resaws, to hold an assortment of necessities for light sewing jobs - scissors, seam ripper, screwdriver, seam tape, pins, needles and such. It's easier to keep these commonly-used items together in one place instead of having to hunt through boxes of supplies. I asked Marcia what kind of things she would keep together for light jobs like putting in hems, fixing open seams, turning collars and jobs like that. Her list was much longer than mine - in fact, if we make her a box for them, it will be more on the lines of a steamer trunk.
December 17th, 2019
Posted by Paul

Here's the repaired d-handle for Mark's spade.
December 15th, 2019
Posted by Paul

We got a vast amount of work done today, including but not limited to: building a raised floor to go in my boat to accomodate a composting head; insetting hinges on a set of doors to go on a kitchen hutch; putting the last touches on a whole series of boxes to get them ready for finishing; and constructing a new cross-piece for the d-handle of a narrow-bladed spade. Our friend Mark brought in the spade and Joe turned the cross-piece out of locust. Mark took the picture of Joe at the lathe.
November 20th, 2019
Posted by Paul

A wheel came off the Smith Bros. road tractor so it had to go into the shop. It will be an easy repair and the rig should be back in service by next week.
November 17th, 2019
Posted by Paul
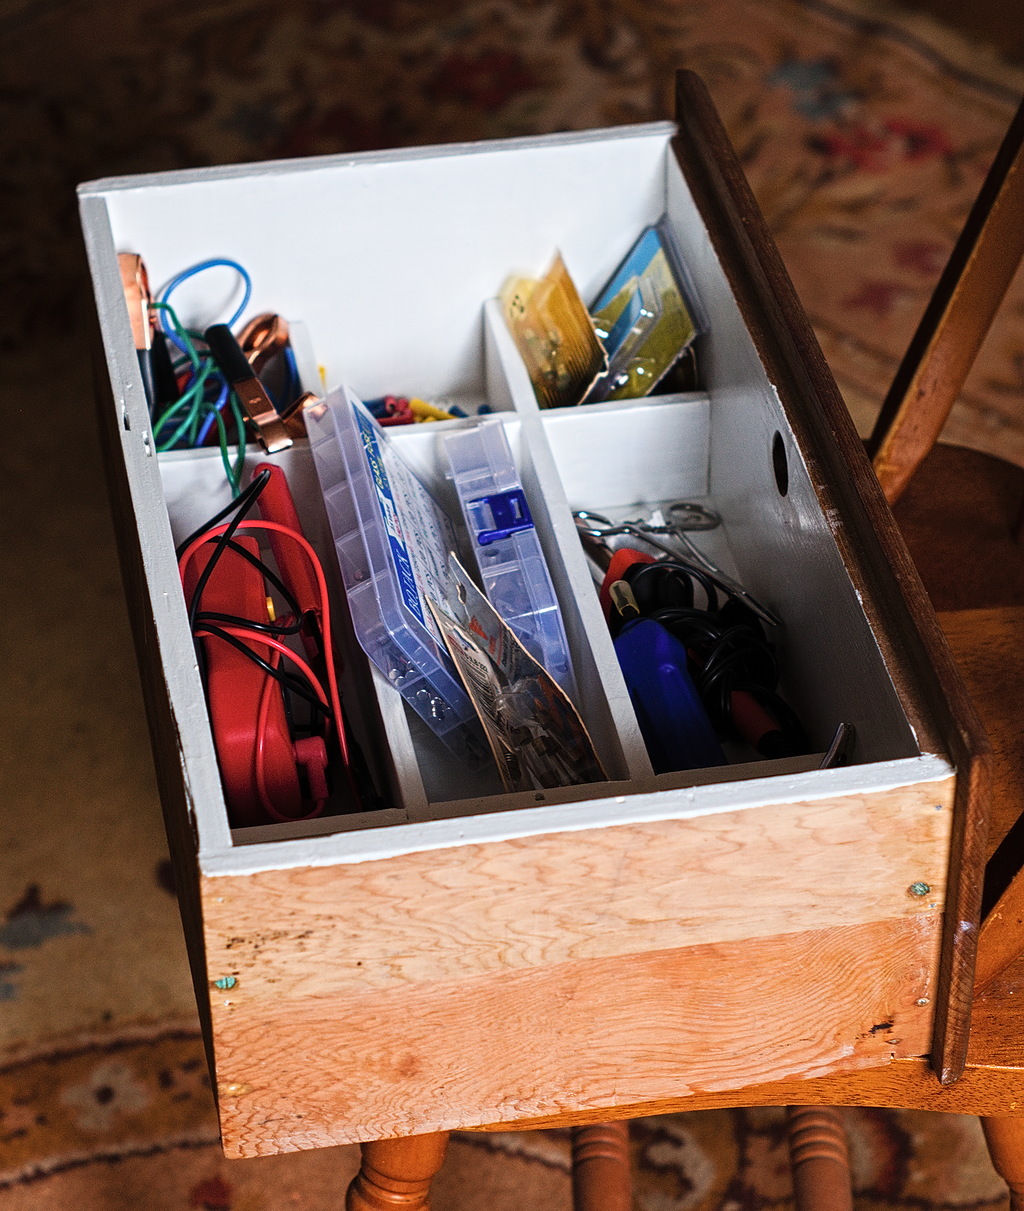
A quick project, dividers for a drawer that goes under the settee on my boat. They will make it easier to organize electrical tools and supplies.
October 27th, 2019
Posted by Paul

Some recent projects: a Sellers Bench in oak that Joe built; and two joint efforts, a cherry slide-top box and a small poplar tray. The first two will probably be donated for a benefit sale, while the tray will hold a collection of old photographic slides taken by PATH member Gordon Burgess.
October 24th, 2019
Posted by Paul

One of our first projects was a small dining table for Marie and Levi that we delivered early in 2014. Lars was born a few months later, so it has always been in his home. Here we see him sitting at the table after school doing homework, under Levi's watchful eye.
October 17th, 2019
Posted by Paul

A big slide top box for storing the PATH photographic archives of Gordon Burgess and David Emrey.
September 22nd, 2019
Posted by Paul

A while back I had the idea to make a 12 volt LED light fixture to use on my boat. We made a quick and dirty model which I tried out last time I was aboard, and it worked nicely. Now Joe has made a much improved model with a better switch and the bulb shielded in a box. A sheet of frosted plastic will slide over the front to cut glare. I'm going to suggest lining the light box with aluminum foil to get more light intensity.
September 22nd, 2019
Posted by Paul

It's usually worth spending a few minutes making a jig or fixture that will let you do routine tasks quicker. We made a gauge for the table saw so we could set up dadoes without having to get out the setup blocks or try to read measurements from a ruler. The gauge works for 1/8th, 1/4th, 3/8th and 1/2 inch dadoes. To use it, you crank the sawblade down, then set the gauge slot over the blade. Then raise the blade until it touches the top of the slot. Then bring the fence over until it pushes the blade to the edge of the slot. Remove the gauge and make the first cut. Then put the gauge back over the blade, back off the fence and set the gauge to the other side of the slot, bring the fence over and make the second cut. Now the two edges of the dado are established and it is just a matter of plowing out the center with repeated cuts (we don't have a dado stack). We tried it today and found it fast, easy and accurate.
September 17th, 2019
Posted by Paul

Joe's current side project is this set of slide top boxes for the twins. They will have felt-lined trays for the girls' chips and enough room at the end for a pack of cards and a pearl-handled Derringer. The girls are avid poker players. Faith is methodical and careful, Hope is an outrageous bluffer. Both are dead-eye shots at close range.
August 19th, 2019
Posted by Paul

We built this little power pack out of locust with the bottom and slide top of plexiglass. We measured it to hold an array of ten AA batteries to provide 12-13 volts from rechargeables. Somehow we lost a sixteenth here and a sixteenth there, and the array, a six-pack and a pair of two-packs, wouldn't quite fit in the completed box. I chiseled a bit out of the inside of one end, but it was still tight. After I looked at it later in the day, the answer was obvious - turn the two-packs sideways. That left plenty of room. That done, I installed two 1/4 x 1 coarse-thread bolts (a standard bolt size on the boat) to use as attachment points for the battery leads. They extend through the case and can provide power for appliances with alligator clip leads. I added another set of leads through holes in the case to an XT60 terminal. The three battery packs are velcroed into the case.
Attached to the power pack is a 12 volt LED lamp that we built for a utility light on the boat. The 3 watt LED draws about a quarter of an amp and provides equivalent light to a 30 watt incandescent bulb. The power pack should provide about 2 amp hours so that would run the light for 8 hours.
August 19th, 2019
Posted by Paul

Mark had one more big locust log that he saved off his burn pile for us. We decided to split it on site to make it easier to handle. We started a split in the end and then worked wedges in all along the side until it came apart. Locust is straight-grained so it wasn't too hard, though Joe worked up a sweat and broke several wooden wedges after he decided that my slow and steady stroke was taking too long and took control of the maul. In this picture Mark looks on with interest while Joe has just thrown down the maul and is getting ready to wipe the sweat out of his eyes. We then split the two halves and got four lengths that were manageable for handling. We loaded them in my truck and retired to the shade of a big catalpa tree to enjoy a round of IPAs.
August 17th, 2019
Posted by Paul

Glue-up. The weight keeps the whole mess from flipping off the table due to the overhanging clamps. Joe and Marcia go to a lot of yard sales and pick up weights any time they find them for a reasonable price. We find a lot of uses for them in the shop - in addition to keeping things in place on the table, a stack of them will flatten a warped or cupped board over time, or apply pressure to a glue joint that can't be clamped.
August 8th, 2019
Posted by Paul

How about combining a little 12 volt electrical with woodworking? My boat runs on 12 volts, Marcia and Joe's RV does too. LED lights are way more frugal of battery power than incandescents or fluorescents. 12 volts DC are benign, they generally won't kill you the way 120 AC will. So I drew up a rough sketch of a 12 volt LED light that could be velcro-ed anywhere on a boat or RV that was close enough to a hot lead and a ground to drop a jumper. We used two pieces of scrap walnut to build a block with the insides chiseled and drilled out to fit a socket, a switch and two wires. We had a bit of trouble soldering the hot wire from the socket to the switch, melting two switch bodies with a gun, but once I hit it with a proper iron, smooth sailing. I think the gun produced so little heat that by the time it got the prong warm enough to melt solder the heat had migrated all the way up into the plastic switch case. Once the switch was wired in, I glued the two sides together (no clamp, had to wrap it with masking tape until the glue set), hit it with four coats of spray-on poly, and potted the exit hole for the wires with shoe goo. Then for the test - I jumpered it to a 12 volt car battery and it lit up. It's a good prototype, it works and I think it will serve to illuminate the wretched tight engine compartment on my boat, saving me from having to hold a flashlight in my teeth when I am working on the A-4.
July 18th, 2019
Posted by Paul

Building a small tool tote out of locust.
July 10th, 2019
Posted by Paul

The Atomic 4 engine on my boat sits under a linoleum-topped counter just below the companionway. It runs better when it is cool, so I usually remove the counter to give it some air. No matter how well things are stowed, they start flying around in heavy weater, and sometimes end up down in the engine well. We built a hardware cloth screen to replace the counter when the engine is running. That should allow for air circulation while keeping random items off the engine. I still need to paint it since the location under the companionway means it will catch some rain and spray in bad weather.
June 30th, 2019
Posted by Paul

Sometimes when it is hard to position clamps, weights can be substituted. The panels in the doors for the cherry hutch we are building are essentially home-made plywood, three layers of 1/8 inch wood stacked and glued. Our hope is that this will prevent the doors from warping. Since we don't have clamps with deep enough throats to reach the center of the panels, we weighted them down to get a good glue seal. We have gradually accumulated a number of weights. Joe recently helped Marcia clear out one of her rent houses and found a substantial number of them.
June 27th, 2019
Posted by Paul

One of our early projects was this Japanese Toolbox, built in cypress. We finished it in October 2014. I use it to carry galley supplies to my boat on the coast. It has made the round trip at least 35 times. Despite getting slammed around in the back of the truck or trunk of the car, tossed from the dock to the boat, and slid across the cabin sole in heavy weather, it's still in solid condition. There is almost no glue in it, just in the rabbet joints between the ends and the bottom. All the other joints are butted together and held with big cut nails. That allows the wood to move. I'm not too concerned about wood movement in furniture that stays in modern climate-controlled houses, but this box that sees extremes of temperature and humidity needs to be able to flex and give, else it will tear itself apart at the joints. We had it in the shop for a few day, giving it a fresh coat of poly as the original finish was starting to wear in a few places. Now it is as good as new - not the same as new, but just as good. The wood has darkened with age and the box has many scrapes and dents, but it is still just as solid as when we built it.
June 23rd, 2019
Posted by Paul

Joe built this step-stool for Marcia's sister RoseMarie while I was off sailing for several weeks. The back legs fold into the front so it stands flat for storage. It is built out of salvage oak and is very sturdy and stable. I know that when Joe delivers it at the Hudson family reunion, more people are going to want one, but he says he won't build any more. We'll see.
May 23rd, 2019
Posted by Paul

Joe pieced together wood from a couple of old furniture items that he parted out to make this stool. The lathe is set a little low for Joe's height, and he half-sits on the stool to get himself slightly lower, so he doesn't have to hunch over his work. He tells me it is much more comfortable - enough so that he thinks he will do more turning in the future.
May 23rd, 2019
Posted by Paul

We worked again today and finished this crate, among other things. It is made of 3/8th inch battens cut off the edges of offcuts and boards with a lot of rot and nail holes (scrap heart pine from Mark's burn pile). We can pick out decent lengths of 10 and 16 inches to glue up as panels, and then rabbet the edges to drop in the sides and bottoms. It's a good use for wood that otherwise would be fire scrap. I find the 10x16x7 inch crates to be very handy for storage.
May 20th, 2019
Posted by Paul

We finally got to do some shopwork yesterday, after a three-week spell of first me, then Joe and Marcia, being out of town. Joe has taken on a project for Marcia's sister, a folding step-stool, to be built out of some straight-grained oak salvaged from an old bedframe. We looked at his drawing, discussed a few design details, and then glued up panels. We left them to dry and did a couple of small projects, things I need for the boat. We built a pair of bookends to go on two irregularly-shaped shelves at the front end of the saloon, and a measuring device for getting angles where the corner is rounded, not square. Then we resawed some cherry to make panels for the doors in Marie's hutch. The panels will be three-ply and drop into rabbets in the door frame. This should help insure against the doors warping. Finally, we put a coat of Waterlok on the boat projects. We'd usually let the glue set overnight before finishing, but again we are pressed for time as I get ready to go back to Edenton. We should be able to get in one more day of shopwork later this week when we can put a second coat of finish on the items.
May 12th, 2019
Posted by Paul

We built the rocker for Lars back in February 2016. He sat in it today while he examined bugs he found in the grass.
April 28th, 2019
Posted by Paul

The two Sellers benches that Joe has been working on got first coats of finish today.
April 24th, 2019
Posted by Paul

While I was in Florida, Joe cut out two more Sellers benches, in cherry and pine. We glued them up yesterday. Here is one ready for final sanding and finishing and the second still in the clamps. These are going to a Firefighters auction in July.
March 29th, 2019
Posted by Paul

The city is having its annual bulky item pickup this month and I found some desk drawers along the side of the road that looked too good to go to the dump. At the shop, we removed the pulls and put them in the hardware box. Later, Joe broke down the drawers into constituent pieces, from which he built the pictured crate.
March 25th, 2019
Posted by Joe

Here is a photo of the toy box that we made a couple of months ago and the joy it has brought. This truly makes the effort worthwhile.
March 25th, 2019
Posted by Paul

When we first started the shop, we made three wooden mallets. The first was Thor, the second was Junior, and the third never acquired a name. In my opinion, Junior is the optimal shop mallet configuration. Since we have copious supplies of locust, an ideal wood for making tools, we decided to make a couple more mallets patterned on Junior. While Junior has a white oak head, the new ones have locust, and all have maple handles. So here we have a picture of Junior, Junior II and Junior III. One of the new ones will go to our friend Mark, who has endowed us with much good salvage wood, including the locust.
March 22nd, 2019
Posted by Paul
Now and then I like to check up on things that came out of the shop. This toy box is one that Joe made for Lars a while back. When it's not full of toys, Lars likes to push Lex around the house in it.
March 19th, 2019
Posted by Paul

A couple of step-stools in front of the heart pine bench show the basic design relationship. I drew the initial design to allow for a quick, simple step-stool to be built from 3 linear feet of construction grade 1x12. It is very similar to a Sellers Bench, but lower, smaller, proportionally wider, with a dropped stringer. Since the first two, from February 2016, we have built them in several sizes and woods, and now scaled up as a bench.
March 10th, 2019
Posted by Paul

First project with the heart pine that we saved off Mark's burn pile. It's glued up and ready to sand and finish. We don't often get a chance to work with this kind of heavy stock, 1 1/2 inches thick.
February 25th, 2019
Posted by Paul

A friend offered us some old planks that he had obtained years ago for a project that went by the wayside. I took an offcut to the shop for us to examine. We found the wood to be heart pine, in good condition. Heart pine is the slow-growing heartwood of longleaf pine. All the old stock has been harvested, so no more is coming to market. The only sources are salvage and dredging up old logs from the bottom of rivers. I told Mark we would take whatever he wanted to give us. He was getting ready to put it on his burn pile and was willing for us to take it all.
We ended up with several good planks, six to eight feet long, nominal 2x8 and 2x6. All had nails, but they were in regular patterns and easy to find. Most of the nails were corroded and loose. We cleaned the nails out of a couple of planks and will get to the others as time allows.
It's not often that we get our hands on this kind of heavy stock. A lot of it will get milled down for boxes, but we hope to use some to build a substantial trestle bench modeled on the step-stools we have been building, scaled-up and lengthened.
Along with the pine we brought home another large chunk of locust. That made a truckload. There is more locust that we will get later, a couple of big logs. We will probably try to split it into halves or quarters on the spot as it is almost too heavy to move.
February 24th, 2019
Posted by Paul

Today we delivered a set of shelves to our friend Dee. We never sell anything or charge for our work, but when someone offers us lunch we don't turn it down. Pastrami and Provolone on rye, toasted and spiced up with German mustard, with a cup of fresh-brewed strong coffee (I took mine with molasses and cream). Dee is one of the best cooks I know. She cares enough to take the time and effort to turn out something good, even just for a quick lunch.
The first project we did in the woodshop, back in September 2013, was a set of shelves for Marie's room, back when she lived at my house. Since then, we built her another to go in the house she and her husband Levi bought after they got married. We built one for Levi's sister, Sally, and maybe another one or two others. We have built so many of these bookshelves that we're getting really fast at them. This one took less than three hours, if you don't include the time spent picking up the wood from Home Depot. This is just the kind of thing we wanted to make when we started the woodshop - solid, simple, inexpensive furniture for friends and family. I'm glad we have been able to stick to this vision, with the worthwhile addition of making lots of things for the firemen's and burn survivors' groups to auction to raise money for their projects.
February 20th, 2019
Posted by Paul

A friend was getting ready to burn a pile of old 2 x 8s in his backyard and told us we could have them if they were of any use for woodworking. I took a piece back to the shop and we milled it into 1 1/2 x 3/8 inch slats. It was heart pine in excellent shape. I emailed him and asked him to keep it back from the burn pile and we would take it all.
He also had a few old trunks of yellow locust that had lain around a neighbor's yard for years, then around his yard, which he offered to us. I took a section home to see if we could work it. First we split it down into quarters and then we flattened two sides of a quarter with a plane, enough to get it to ride through the table saw without wobbling. We milled out a 1 1/4 x 1 3/8 inch stick that I will use to build some cleats for my boat. We will probably mill some slats and also some blocks for mallet heads. We will also try turning it. If we can cut it on the lathe, it would make excellent tool handles and dowels. Like the pine planks, I asked him to hold on to all of it for us.
February 16th, 2019
Posted by Paul

Even though we don't sell anything, (we give things to friends and to charity sales) we still call it payday when we have several things to finish at once. Today we brushed polyurethane on two slide-top boxes, a step-stool and a set of shelves. The shelves are for our friend Dee. She once gave us a beautiful old-growth yellow pine board. We won't forget that generous and perceptive act. The step-stool is for Marcia's grand-daughters, so they can reach the top shelf in the bathroom. The slide-top boxes will go to a charity sale, perhaps.
February 7th, 2019
Posted by Paul

In the background, behind the steady stream of boxes, crates and totes, we usually have a major project. Last October we started on a kitchen hutch for Marie. The base is coming along, and then we will build a set of shelves to go on top. It is in cherry, mortise and tenons with floating panels. The cherry is easy to work. It's not surprising that it has been a favorite wood for American furniture makers for many years. This is a complex, difficult project for us, and it is taking a lot of time. Today we managed to glue up the case and get the lower shelf installed, which feels like a real breakthrough. I told Joe we should have it finished by Christmas. I hope we finish it long before then.
February 4th, 2019
Posted by Paul

Another look at Joe's mahogany box.
January 31st, 2019
Posted by Paul

This box is something Joe has been working on for quite a while, and as of today it is finished - although he will rub a coat or two of wax on it once the polyurethane finish is thoroughly cured. It is made of mahogany that he found - free - on craisgslist. The top design is laminated mahogany and maple on a mahogany base. He plans to donate it for sale or auction to benefit the firefighters through his burn survivor group. A lot of work out of the shop goes there.
January 29th, 2019
Posted by Paul
I have many albums of prints that were taken by my friend Gordon Burgess. The pictures document the work of Piedmont Appalachian Trail Hikers maintaining the Appalachian Trail in southwest Virginia. I have posted scans of hundreds of these pictures in an ongoing project to preserve the images and the club history they document. As far as I can determine, Gordon shot mostly Kodacolor, but he would have slides made from some of the negatives and present slide shows at club events. The slides were all stored in Kodak Carousel rotary trays. I think the days of slide shows have passed, since digitized images can easily be displayed on big-screen TVs and monitors. The trays are bulky and hard to store, so I decided to pass them on to Goodwill. Perhaps an antiquarian or Luddite photographer might find them there and get some use from them. I'm not quite ready to throw away the slides, so Joe and I built a slide-top box to hold them for long-term storage.
We had some nice cherry off-cuts, scraps and resaws from a project. We used them to cut out and glue up parts for two standard 8x10 slide-top boxes. When we were done, we found that we had enough left over to build another box of about 4x6 inches out of second-order scrap. What was left we threw in the fire so we didn't get stuck in an endless recursive loop of building smaller and smaller boxes.
January 21st, 2019
Posted by Paul

I'm working on a side project at home, a model of a New York pilot cutter from the 1870s. I started it years ago but quickly decided I was in over my head and set it aside. After working in the woodshop for several years I felt I had built up enough skills and confidence to proceed, so I got it back out and resumed work. So far it is going good. The hull is almost finished and the next step will be the deck houses and fittings, then on to the masts and rigging. While much of the hull work is best done with the model in hand, the later steps are easier with the boat right side up in a cradle. So we built one at the shop out of scrap wood. Once the model is finished we will build a permanent stand out of some nicer stock.
January 4th, 2019
Posted by Paul

Joe built this laminated fishing net for his occasional trout-fishing trip on the Watauga River near Boone. It is very similar to one I built at Dale's shop 40 years ago.
January 3rd, 2019
Posted by Joe
Here are a couple of projects that I have completed for some friends. The maple cutting board is for D'Ann, the ends are tongue and groove so to stave off splitting, and the pine toy box is for Liz's new baby daughter. I used the stacked alternating corner method that we have had so much success with and there is no top to pinch fingers. I welcome requests sometimes as I lack inspiration frequently.
December 23rd, 2018
Posted by Paul

This simple, small box came out nicely. We fitted the hardware and rubbed on a final coat of finish today. It will probably go to one of the charity auctions next year.
November 15th, 2018
Posted by Paul

This box is one of Joe's projects, though I had the pleasure of helping with it today. It is made of mahogany that Joe found on Craigslist, free from a man who had some left over from a project. Now, a lot of things are called mahogany these days, very few of which are the traditional Cuban or Honduran mahogany, the furniture wood of choice in America and England during the Colonial period heyday of fine furniture. Cuban and Honduran mahogany are endangered species that are almost unobtainable these days. Sapele, Luaun, Utile, all are marketed as mahogany. The closest thing to traditional mahogany is African mahogany, which is in the same genus and has many of the same characteristics. My guess is that this box is made from African mahogany. This wood is beautiful, with attractive grain and color, and is very easily worked. We are lucky to have a chance to use it, since it is under heavy pressure itself, and will probably become endangered in our lifetimes.
This box is getting an inlaid top with ash as the light wood. Joe had completed constructing the bottom and sides as well as the sub-base for the top. Today we started cutting and glueing the inlays onto the base.
This is the page for posts from 11/15/18 through 02/26/21. Newer Posts -
Older posts -
Copyright © 2018-2023 Paul M. Clayton
Links
- Steve Wall Lumber Company
- Primeval Wood
- Bluejacket Boats
- Christopher Clarke Antiques
- Oldwolf Workshop Studio
- Tremont Nail Company
- Lost Art Press
- Patrick's Blood and Gore
- The Furniture Record
- The Unplugged Woodshop
- Paul Sellers
- Oregon Woodworker
- Bob Easton
- Matt's Basement Workshop
- The Wood Database
- The Literary Workshop
- By Hand & Eye
- Hand Tool Woodworking
- HJT Woods
- Burn Support Group
- Neuse River Sailors
Comments?
Email us at woodshopatjoesbasement
@gmail.com
Copyright © 2018, 2019, 2020, 2021 Paul M. Clayton